Thursday, February 28, 2013

Ben & Jerry's Ice Cream Tasting


Posting courtesy of Kitchen Delights London Reporter.

In a crowded ice cream market, the launch of a new ice cream flavour has to be exciting, interesting and crucially have the wow factor.

Last Tuesday night, I was invited along with a hip crowd of food blogger's to the sneak preview of Ben and Jerry’s latest flavours in Central London.

Blondie & Brownie
First up was the ‘Blondie and Brownie’ ice cream. It contains lush brownie pieces in vanilla and chocolate ice cream with a salted caramel core running through it. The sweet and salty pairing worked really well and was much better than I expected. Heaven really!

Peanut Butter Me Up
Second up was the ‘Peanut Butter Me Up’. Inspired by classic peanut butter and jelly (or jam!) sandwiches, it has a raspberry jam core running deep into the ice cream, surrounded by peanut butter ice cream and vanilla ice cream with peanut butter chunks contained in small chocolate cups. This was brought to the UK by pester power alone, coming straight from the States. Worth a try!

Putting the tasting aside, I did learn something quite extraordinary about animal welfare. All Ben and Jerry’s dairy comes from moo-saged (massaged) cows in the Netherlands where the animals even get to choose if they feel like a massage or not. In times when we are questioning where our food comes from, it’s an interesting story with a fun video here:  


Thank you Anna for the invitation to 'eat ice cream'.

Back Story I The Rajasthani Gypsy

Photo © Tewfic El-Sawy-All Rights Reserved
Dinesh Khanna's statement (see my previous post) of "color is almost a language in India" reminded me of one of my favorite color photographs.

So I thought of featuring it here with its short back story. It was made in 2003 with a Canon 10D (remember those?) and is of a Rajasthani gypsy couple I had met at the Phulad train station, which is near the small town of Jojawar, located between Jodhpur and Udaipur. I recall they had been waiting for a train to Pushkar.

I made a number of sequential frames of this couple, who were quite pleased to pose for as long as I wanted. Another frame (not shown here) is of the man hugging his wife with a broad grin on his face...I actually sold a number of the two versions to various magazines and travel catalogs in the UK.

Would you agree that it's the color vibrancy of the photograph rather than the expressions of the Rajasthani couple that made it attractive to these magazines, especially with the blue background?

But let's also view it in monochrome ( using a quick conversion method).

Photo © Tewfic El-Sawy-All Rights Reserved

Not as attractive as the color one, but still not bad. It being in monochrome perhaps focuses the viewer's attention to the couple's expressions...the squint of the man's eyes, and the women's awkward facial demeanor...and there's no blue background or pink turban to distract us....all we have left are the expressions and the man's regal allure. 

So in this particular case, I think the color photograph trumps its monochrome version...but as we know, black & white can be (and is) frequently more compelling than color. During my The Cult of Durga Photo Expedition for example, the group produced Durga Puja stories in black & white, to exploit the grittiness of Kolkata's streets...and in such an environment, perhaps shooting it in color would have been a distraction.

But wait! What about some artsy processing of the photograph by converting it to a "wet-plate" or "tin type"?


Does this artsy conversion trump the color version? I leave it to you to decide. As for me, I believe it certainly adds visual interest to what is a static portrait. It might qualify as "trickery"...but isn't photography itself a trickery of sorts?

I was very much against the concept of applying filters or manipulating photographs... even preferring not to crop or alter much at all from what I had captured in camera. But I've mellowed a little bit recently, and although 99% of my photographs will remain unaltered...there's room to do and enjoy stuff like the "wet plate" look.

Wednesday, February 27, 2013

Trip Report: Echo Lake 2/23/13 – 2/24/13

We only have another month or so of winter left, so I have been trying to make the most of it before the weather warms up. This past weekend some friends and I had planned on going ice fishing. More precisely, they were going ice fishing, and I was going along with them since I don’t know what I’m doing. To my surprise, Saturday morning, just as I was getting my gear in the car, I got a call from them telling me they were bailing out. The weather report was for rain and/or snow the whole weekend, and that wasn’t their idea of fun.

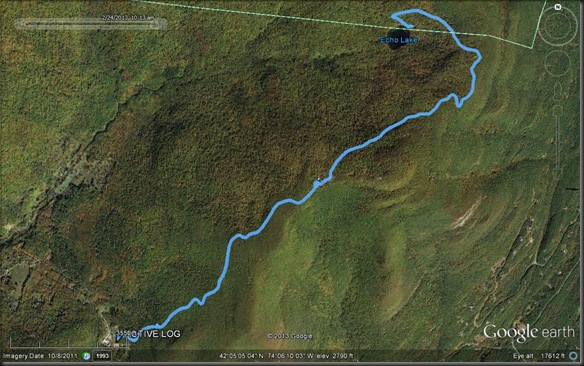
Since I was already geared to go, I decided to make a quick change of plans. I looked at my maps, and quickly planned out another trip. Some time ago I had done a trip with the AMC where we passed some ruins of an old building. At that time we continued on through the mountain range. However I remembered that to the west there was a small lake, one of the few in the Catskills. It’s called Echo Lake. I decided that for my trip I would hike out there, spend the night by the lake and then go back. It would be an 8 mile round trip, over fairly easy terrain. So, I hopped in the car, and two and a half hours later I was at the base of the mountain.

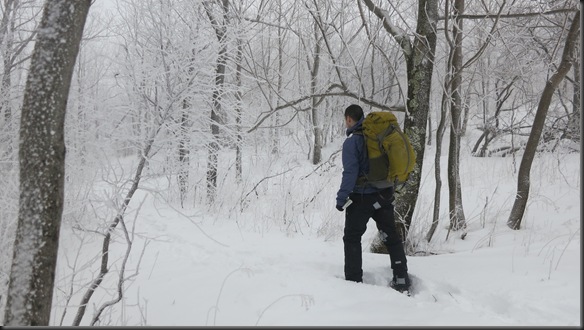
When I got there, I looked at the weather conditions. I had brought my snow shoes with me, but looking at the snow cover it didn’t seem deep enough to require them. I decided to leave them in the car.

016

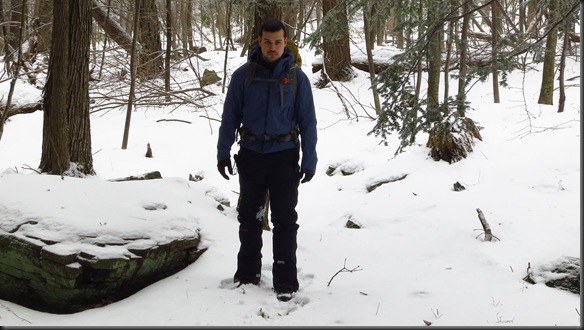
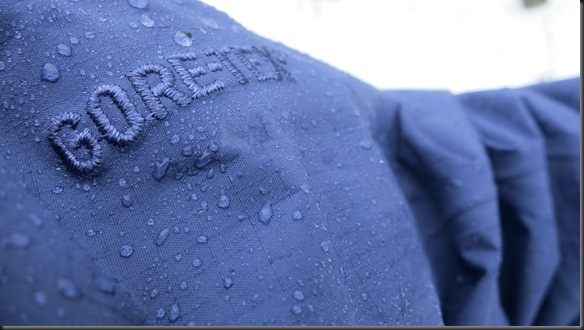
The temperature was in that horrible range right on the edge of freezing. It was cold enough for the snow to stay on the ground, but it was soft and hard to walk on. It was snowing/raining. It seemed like ice. It would stick to the trees in the form of ice, but would melt on my clothing.

132

138

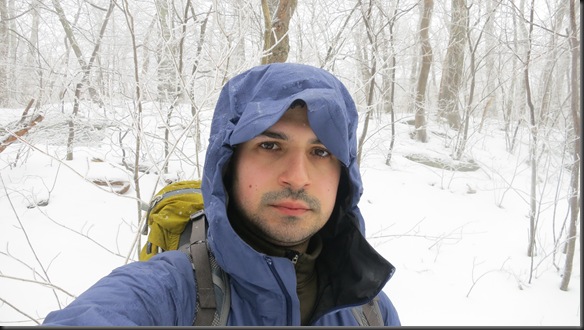
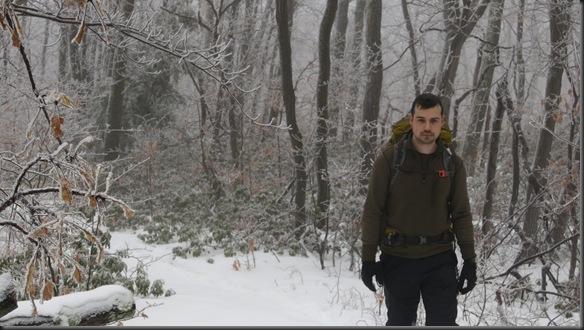
I had to wear my shells for most of the trip, which I generally don’t like to do. By the way, if my face look weird, it’s because I had three of my wisdom teeth pulled out that Monday, so I was still a bit swollen on one side.

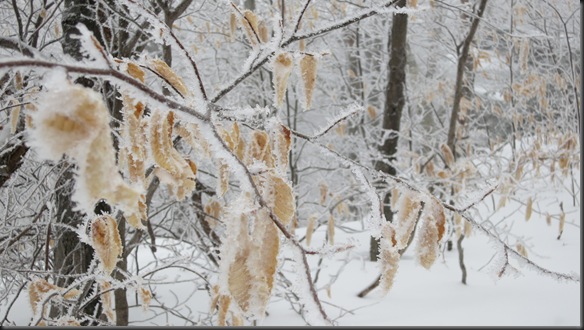
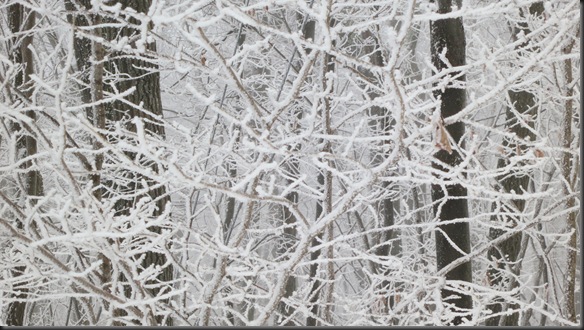
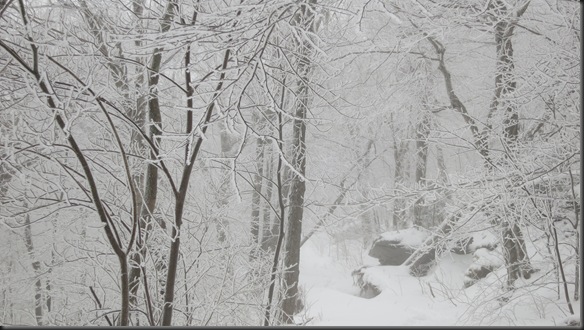
Anyway, the snow/ice/rain was sticking to everything, covering all of the trees and branches with a coating of ice. This wasn’t the type of snow that you can just shake off the tree. It was solid ice covering everything. Starting fire in this weather would definitely require some wood processing.

127

048

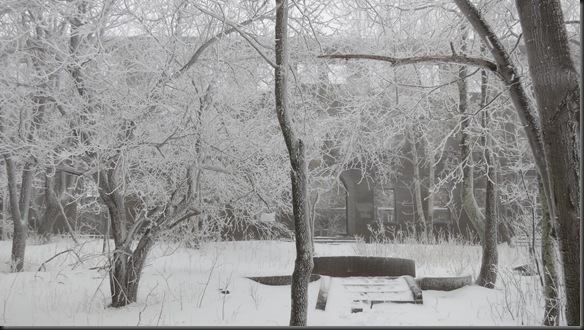
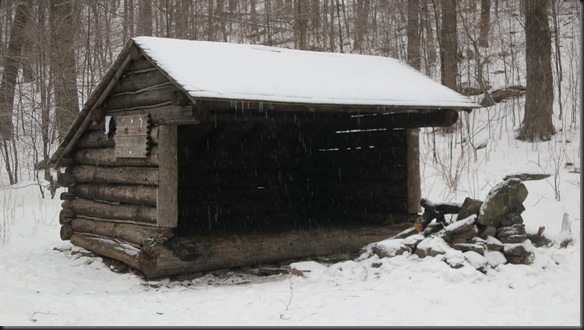
The traveling wasn’t hard. The elevation change was continuous and gradual. Enough people had passed this way so that the snow had been compressed and walking was not much of a challenge. By noon I had already reached the ruins which marked the half way point of the trip. I know I have shown you photos of them before, but I figured I would show you some more in the snow.

060

063

067

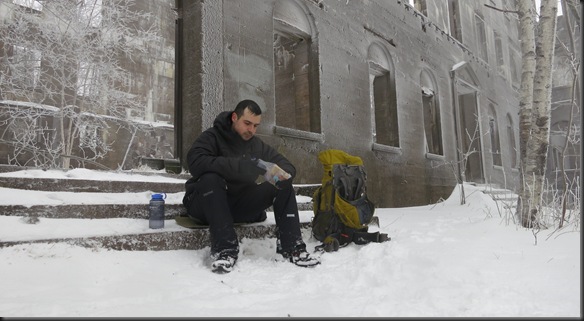
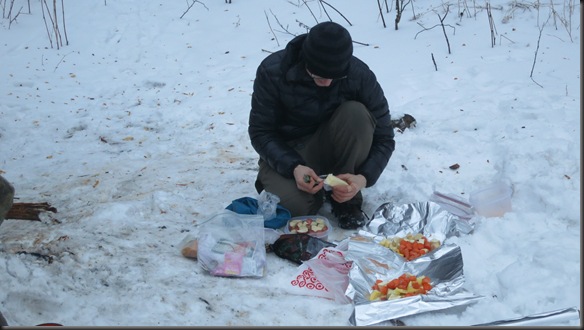
Since it was noon, I figured this would be a good place to stop for lunch and to take my pills (a mix of pain killers and antibiotics, courtesy of my dentist).

084

When I was finished, I took the detour to Echo Lake. I imagined that it would be a popular destination, even in winter, but apparently I was wrong. There was only one set of footprints, and looked to be a week old. As a result, none of the snow was compressed, and combined with the higher accumulation at this elevation, I started sinking in immediately. I regretted leaving my snow shoes in the car. At places it wasn’t bad, maybe ten inches or so of snow, but in other locations it was knee deep. After a while there were no tracks at all. It looked like I was the first person to go to the lake from this side of the mountain in a while.

110

You could still see that there is a trail cut through the woods, but no one had used it in some time.

117

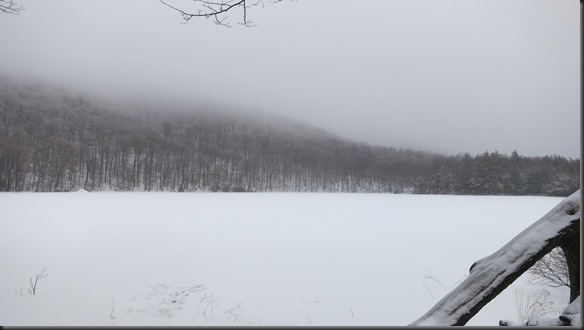
After a few more hours of pushing through the snow, I reached the lake. Luckily, most of the way was down hill. I tried to leave good tracks which I could follow out the next day assuming we didn’t get any serious snow. By the time I reached the lake, much of the mountain was covered in fog.

161

There was a decent lean to shelter by the lake. I don’t like to use them, and prefer to set up my own site away from people, even though the fire place was tempting.

145

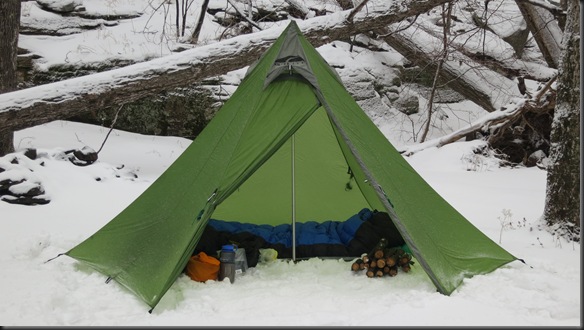
I kept going alongside the lake until I found a good location a bit further up the mountain where I could set up my camp. When the tent was up, I started gathering some firewood which I stored in the tent.

202

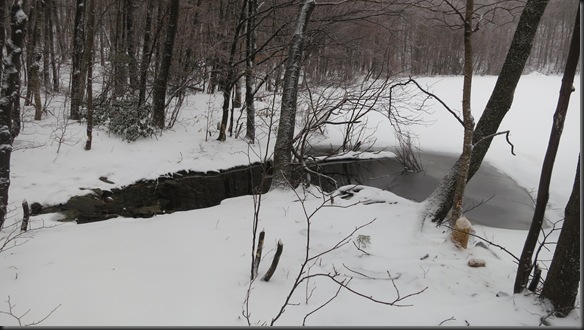
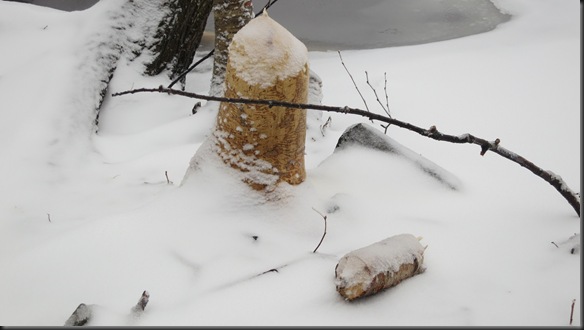
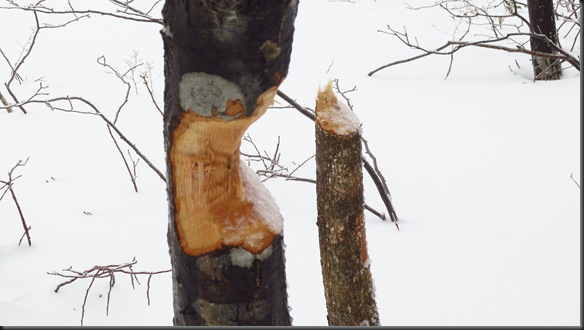
I wasn’t planning on a large fire. I usually don’t these days. I just wanted enough to use for melting water and for some warmth for a few hours. Since this area had only hardwood, and it was all covered in ice, I knew I would have to split some to get a fire going. I hadn’t brought my hatchet, so I was limited in the size of wood I could effectively process. Luckily there was some birch by the water, which would make the job easier. There was also ton of beaver sign.

187

190

182

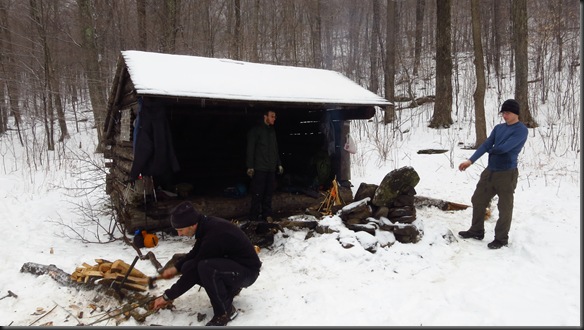
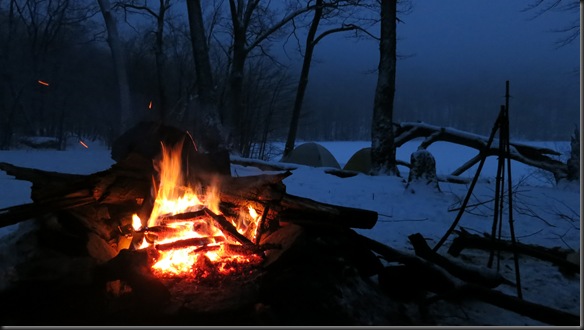
As I was continuing to gather fire wood, I heard some voices in the distance. They seemed to be coming from the lean to shelter. I made my way back there and saw a group of four guys setting up there. We introduced ourselves, and it turns out they had come from the other side of the mountain and were staying there for the weekend. After talking for a bit we decided to just make one common fire at the shelter that we could all use in the evening. The company was appreciated.

217

The guys had brought an insane amount of food with them (well, one of them had), which he proceeded to prep for grilling on the coals.

222

After splitting some wood we got the fire going. One of the guys had brought a Roselli hatchet, which worked well in that role. It’s not something I would want to carve or chop with, but it splits like a mini maul.

226

The grilling soon began, and we spent a large part of the evening just killing time. I have to say, these were some of the best ribs I have ever had, and I have no idea how he managed to cook them that well on a camp fire. Much better than my usual instant mashed potatoes.

The next day I got up early, and after having breakfast, I packed up and set out. Everything was wet, and I had to pay great attention to maintaining certain items dry such as my jacket and sleeping bag.

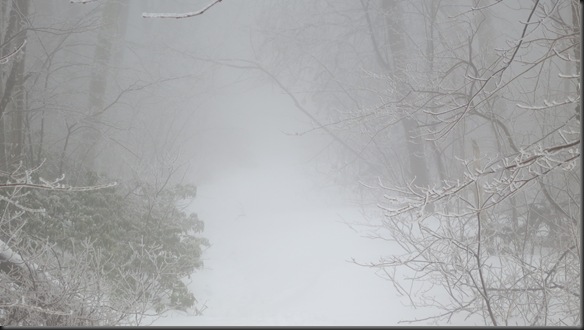
After climbing only a short distance in elevation, I entered the layer of thick fog that was covering the mountain.

243

I expected this part of the trip to be much worse than it was. I was able to follow my footsteps out pretty well, and while there was more snow/ice coming down, there the tracks were still very clear. After a few more hundred feet in elevation, the temperature dropped noticeably down to about 23F (-5C). With the lower temperature, there was no more melting snow and ice. There was just snow. I could finally remove my shell jacket.

247

Not long after that the fog cleared and all that was left was a beautiful, frozen winter landscape.

256

After another hour or so I was back up to the highest point in the trip. From there it was a quick descent down. I only stopped to eat and drink water. A few more hours, and I was back at the car.

1

It was an eight mile round trip with about 1200 ft elevation gain. The route required me to go up to a high elevation, and then descent towards the lake. I would then have to climb back out and then down the mountain, creating this amusing elevation diagram.

2

A nice, fun, easy trip overall. I met some nice guys and had a good time. The weather is my least favorite. I would have much preferred it to have been a little colder, and I also wish I had brought my snowshoes, but those are minor nuisances in an otherwise fun trip.

Tuesday, February 26, 2013

Stuffed Mushrooms with Leeks, Dolcelatte and Walnuts: Recipe

All photographs taken with the Nikon D3200                           
'Life's too short to stuff a mushroom' - does anyone still use this expression? In 1975 Shirley Conran, published the book Superwoman, aimed at busy women and gave advice about life using the phrase 'Life is too short to stuff a mushroom'........This recipe is definitely well worth the time spent making something tasty and inexpensive from just a few fridge and store cupboard ingredients.

Served with a simple risotto.
I placed a small amount of risotto on the plate for the photograph because it very quickly goes stodgy and doesn't like to be left hanging around, otherwise you may well end up eating it for pudding. After taking photographs, which as usual were taken speedily during cooking and serving, I topped the risotto with the remaining walnuts, Dolcelatte and thyme leaves, to give texture and interest.  I made a tried and trusted risotto recipe, used half the recommended quantities of ingredients and simply left out the bacon, leeks, Parmesan and chives.

The original recipe for the Stuffed Mushrooms with Leeks, Dolcelatte and Walnuts is from the Waitrose Kitchen Magazine - February 2013.

Adapted Recipe

Serves: 2

5 large flat mushrooms (chop one and leave the others whole)
1 tbsp olive oil
1 tbsp garlic oil
1 leek finely chopped
a few thyme leaves
25g Dolcelatte Cheese
25g walnuts chopped

1. Preheat the oven to 200ÂșC. Mix the olive oil and garlic oil together and brush one tablespoon over the whole mushrooms. season with black pepper.  Place on a roasting tin top-side down and cook for 10 minutes.
2. Heat the remaining tablespoon of oil in a frying pan and fry the leek, thyme and chopped mushrooms for approximately 5 minutes until softened.
3. Divide the mixture between the four upturned baked mushrooms, top with cubes of  Dolcelatte cheese and chopped walnuts, season.
4. Bake for 10 minutes or until the cheese melts.


Dinesh Khanna | Kolkata

Photo © Dinesh Khanna-All Rights Reserved
I am surprised that I haven't featured the work of Dinesh Khanna since my post in March 2007. After all, he's the one who is quoted in having said "" Color is almost a language in India. It's in food, clothes, on walls, in architecture."  

He also happens to be one of the major forces of photography in India, and as a co-founder and Managing Trustee of Nazar Foundation, set up to promote photography as an art-form in India, he mentors young photographers. He is also a co-founder and one of the Creative Directors of the Biennale ‘Delhi Photo Festival,’ whose first event was extremely successfully in Oct. 2011...and will be in its second iteration in fall of 2013.

His resume is as long as it is diverse. You'll be as surprised -as I was- to read that he worked as a calculator salesman, garment quality checker and a busboy in New York's East Side before becoming the successful photographer that he is now.  But prior to that shift, he spent over a decade in advertising until he experienced what is sometimes termed "burn-out" at the age of 33. It was then he took up photography, and spent two decades creating images for the advertising, editorial and corporate fields, achieving a well deserved notoriety. 

Not content with these achievements, he produced two books – Bazaar and Living Faith..the culmination of over a decade of travelling through the traditional markets and religious centres of India. He's also working on his next book, Benaras: Everyday in Eternity which will be published in 2014.

I chose to feature his work of Kolkata; one of my very favorite cities in India. As you can see, his  photographs are remarkably well composed, extremely colorful and lovingly saturated...and emit the color of India...the pow! he so well describes. 

No question. A guru of photography.

Monday, February 25, 2013

Kovea Spider (KB-1109) Long Term Review

Back in July of 2012 I was contacted by Kovea, a Korean company, regarding reviewing one of their stoves that they were about to release on the market. The stove was the Kovea Spider. After a few uses, I did my initial review of the stove, which you can see here. Up through that point I had been using a MSR Whisperlite International white gas stove. The reason was that I don’t like changing stoves based on seasons, and a white gas stove was the safest bet for having a reliable stove in winter. After using the Kovea Spider however, and seeing what it can do, I decided to start using it as my main stove and see how it would perform under different conditions. In short, the results have been impressive.

1543

The stove weighs 6.0 oz, one of the lightest canister stoves on the market, and can currently be purchased from Kovea for about $52. For such a stove this is dirt cheap. Similar stoves by MSR and Primus cost over $100. This is the bargain of the year. You can buy the stoves at the Kovea eBay store here.

As a bit of an overview, the Kovea Spider is a remote canister gas stove. What makes such a stove different from a regular canister stove is that it allows the fuel to be used in liquid mode rather than just as a gas. That is done by inverting the canister after lighting the stove. A preheating tube then vaporizes the liquid fuel before burning. This mechanism allows the stove to function at much lower temperatures than a regular canister stove that relies on the fuel to be in gas form. The reason for that is that most fuels stop gasifying at below certain temperatures (usually about 20F for Isobutane, and about 40F for Butane). By inverting the canister, you can use such a stove at temperatures below 0F (-18C). I like to use MSR fuel canisters because they contain 80% Isobutane and 20% Propane. Propane remains a gas down to –40F, which means that I always have enough pressure to start the stove before inverting the canister to allow it to function in liquid feed mode.

3283

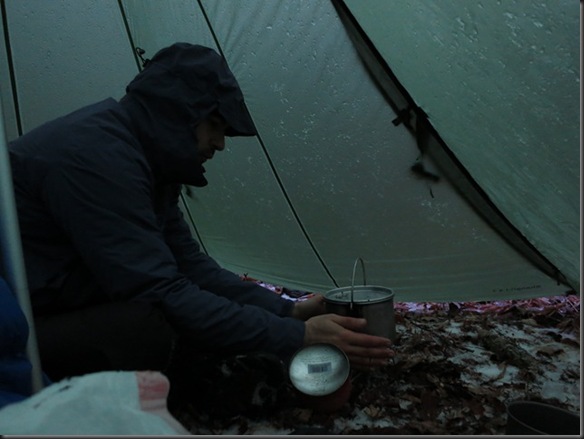
In order to see the stove in use, all you have to do is look at my trip reports. I have been using this stove exclusively for the past five months. It is powerful enough and works well enough in the cold to melt snow, while at the same time is easy enough to operate inside my tent (do at your own risk).

4683

The construction of the stove is excellent. The legs are solid and lock into place. The fuel connection is solid. The design of the valve makes it easy to invert the canister. The stove keeps functioning in cold conditions even when the canister is nearly empty. From a design and construction stand point, I can not say anything negative about it. The more I use it, the more I like it.

110 - Copy[3]

One thing to keep an eye out for though is to make sure that the stove is properly primed when you are using it in cold temperatures. I have successfully used it at –10F (-23C), but you have to let the stove burn with the canister upright for about thirty seconds before inverting so that the preheating tube warms up. If you don’t you will get flair ups much like you would with a white gas stove that has not been adequately primed. The flair ups are smaller than those you get with a white gas stove, but they can be easily avoided all together by properly preheating the stove before using it in liquid fuel mode. Also note, that while the stove works at low temperatures, it does not put out as much heat as some of the white gas stoves currently on the market. If you are melting large quantities of snow, it will take you quite a bit longer than it would with a stove like the MSR Whisperlite.

4593

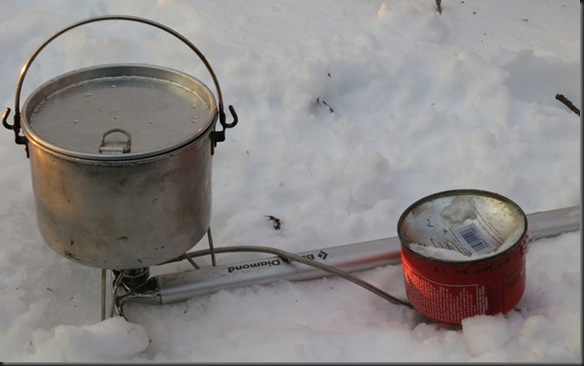
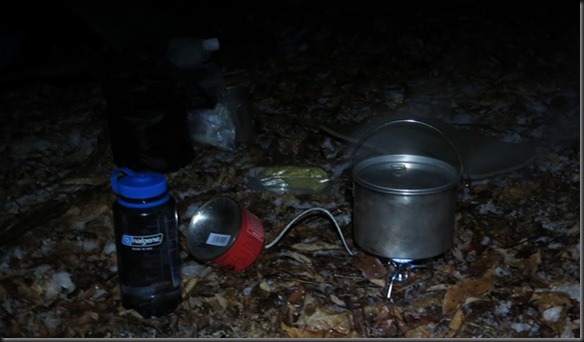
I know that I am not using the greatest of pictures in this post, but as a long term review, I wanted to show you the stove in use under some real, and less than ideal conditions.

4923

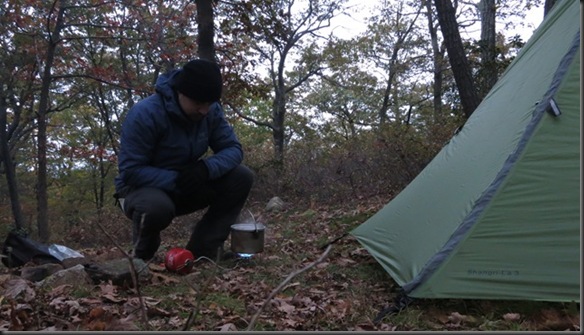
Overall, this is one of the best pieces of gear that I own. It has performed very well under a wide range of conditions with zero fiddle factor. As you can see from the picture the stove is powerful enough for me to not even bother with a windscreen (you should use one to increase efficiency). It is incredibly easy to use, and has no unnecessary features that can fail. For $52, in my opinion, it is one of the best stoves on the market. In fact, I would go as far as to say that even for $100 it would still be one of the best stoves on the market. Of course, others spend more time testing stoves may have different opinions on the subject.

Denver Post | Victims of the Taliban

Photo © AP/Muhammed Muheisen
It shouldn't be any surprise to anyone following international news to realize that the real danger to Muslims around the world is the terror, intimidation, repression and genocide committed by fellow Muslims. Whether it's Sunni violence against Shi'a Muslims (or vice versa), or Sunni Muslim against fellow Sunnis...whether its by the Taliban, Al Qaeda, Jamjaweed or the Mali Islamists (to name but a few), it is Muslims who suffer the most.

The Denver Post's photo blog featured poignant portraits of a handful of Pakistani victims maimed by the Taliban. Their stories are rarely heard in Pakistan, but they're all against any reconciliation with the Taliban, and the mere idea of negotiating with people responsible for their pain is abhorrent.

The photographs are by photographer Muhammed Muheisen.  He was born in Jerusalem in 1981 and graduated with a degree in journalism and political science in 2002. He is currently based in Islamabad, as the Associated Press chief photographer of Pakistan.

Since 2001, he has been covering major events in the Middle East, the Israeli-Palestinian conflict, and the Iraqi conflict, as well as events in Saudi Arabia, China, Afghanistan, Yemen, Egypt, Syria, and France. He received several international awards including the Pulitzer Prize for Breaking News in 2005, a POYi in 2007, an APME Journalism Excellence Award, and first prize in the 2012 National Headliner Awards.

Sunday, February 24, 2013

The Other Hundred


Here's an worthwhile open call for photographs from The Other Hundred, which is an initiative of the Hong Kong-based Global Institute for Tomorrow. The intention of the open call is to to tell the story of people who are far from being the world’s wealthy, but whose lives deserve to be celebrated.

The Other Hundred is interested in photo submissions from all corners of the globe, and hopes to attract both professional and amateur photographers so the project can consist of as many contributors with as different perspectives as possible.

The Other Hundred will be published as a book of 100 photo essays featuring the hardships and triumphs experienced by extraordinary but simple people that remain anonymous and unknown.

The book is due for publication in October 2013, and will use images from world class photographers as well as from open submissions via the internet.  Proceeds from the publication of the photobook will be donated to organisations dedicated to addressing social issues and inequality across the globe.

The winning entrants whose photographs are published in the book will receive a US$300 honorarium, and the deadline for submissions is April 1, 2013.

The jury is made of Ruth Eichhorn, Richard Hsu, Stephen Wilkes, Chandran Nair, Simon Cartledge, and Stefen Chow.

Saturday, February 23, 2013

Nikon D3200 - Review

One of the most exciting emails to drop into my inbox recently was an invitation to use the new
Nikon D3200 camera and share this experience with my readers.

I have never written a blog post about how I use my camera to take photographs of food and I’d like to give you a glimpse of what I do. I’m not a techno wiz at all so this is a straightforward review of the camera and how it is helping me to take better pictures for the blog.
Using my Camera in the Kitchen
Before reviewing the camera I will paint a picture of how I normally take photographs for the blog. The majority of my photographs are taken in the kitchen and this is during cooking and serving food. I have to work with limited daylight, unfortunately my work surface is situated away from the window, to compensate for this I use a couple of lamps, I also use a tripod approximately 40% of the time particularly when lighting conditions are poor. Experimenting with backgrounds to complement the food can be anything from wallpaper to various materials. If the weather is good I take some photographs outside on the patio table to take advantage of natural light.

I only use the supplied zoom macro lens, this is quick to frame the subject and is able to get in very close. When framing the subject I try to vary both the layout of the food, the distance from the food and use various angles of shot, I always have a stool handy to stand on to help achieve this, again speed is of the essence when serving up food.

Introducing the Guide Mode
The on-screen Guide Mode Option is a very good introduction to using the camera and its many features. Easy or Advanced Operation present many options, for example how much of the picture is in focus or whether moving subjects are frozen, whether to use live view or the view finder and so on. For food photography there is a setting 'bright subjects' when in advanced operation.

The Guide Mode is not just for shooting pictures, it is also there for viewing, deleting and setting up the camera. Handy if I am in forgetful mode, without the instruction book.

Using Auto Mode
This setting is for point and shoot photography, most of the settings are made by the camera according to the picture taking conditions. There is also an easy 'flash off' setting by rotating the mode dial one click anti-clockwise, very handy for point and shoot Auto Mode.

View Finder
A number of focus points can be seen through the view finder, when the shutter release is pressed half way down, one or more of these points turn red and shows which part of the image will be in focus. I found these a little confusing at first but when in Aperture Priority mode you can select which part of the image will be focused on. These focus points are easily adjusted with the four way button situated on the back of the camera. The points can also be seen on the monitor screen when I use the camera on a tripod.

Using Aperture Priority
I prefer to use 'Aperture Priority' for my food photography, this allows me to use selected focus points, as mentioned earlier, to give selective sharpness. The manual setting of the aperture together with the use of the extended ISO range allows for blur effects or sharpness as required, on the monitor screen there is a reminder icon showing the aperture size. I often use the built in flash to minimise foreground shadows.

Image Quality
The camera has various settings for picture quality and image size, I use normal on image quality and large JPEG on image size. When readers to my blog view my photographs it is possible to click onto the photographs for a better view by using these settings without seeing excessive pixelation.

From Camera to Blog
I use an Eye-Fi card, which is directly supported by the Nikon D3200, this facilitates easy picture transfer from the camera to the computer without using connecting wires. This is an amazing convenience feature.
Using the Remote Function
Cooking is messy, and whilst I am cooking and taking photographs, typically without any assistance, I have been trying to make more use of my tripod. The Nikon D3200 has sensors on both the back and front of the camera. The remote function is built into the camera and the actual remote is an optional extra. Using a remote helps keep the camera clean and eliminates any possibility of introducing the camera to shake.

Recording Short Movies
The camera has easy access to record and play back short videos, to start recording enter 'Live Mode' and simply press the 'Movie Record Button' shoot the video - to end the recording simply press the same button again. To play back the movie on the camera monitor all you have to do is press the playback button and then the OK button.

There are various options for movie quality in the 'Movie Settings' including HD. The maximum length of a movie is 20 minutes, given sufficient memory.

To view the movie, this can be via television, computer or the camera monitor. From the movie still pictures can be recorded as JPEG.

I hope to make good use of this facility and post some short videos on the blog.

The Verdict
The camera is capable of taking excellent photographs under various conditions in a user friendly way, it is easy to get a sturdy grip and it is a very transportable camera without unnecessary weight.

The Camera - What's in the Box?
Nikon D3200 camera body.
Nikkor 18-55mm f3.5-5.6G lens with VR(vibration resistance).
Lens cap, camera body and back of lens protective caps.
Battery and charger.
Shoulder strap.
USB cable.
Audio/video cable.
Software.
User’s Manual in print form.
Reference Manual on CD-ROM.

You will need:
A suitable memory card.
Ideally a protective case.

Thank you to Nikon for sending me the D3200 to review.

Jens Lennartsson | The 100 Days

Photo © Jens Lennartsson-All Rights Reserved
Here's an extremely interesting and useful travel photography resource which ought to be bookmarked by aspiring (and established) travel photographers. It's Jens Lennartsson's 100 Days.

Jens' objective is to share his extensive knowledge of travel photography with his readers and followers, and seeks to help photographers to tell and share their experiences in photography.

Every day, a short 'lesson' is updated on 100 Days...it could be about wide lens or it can be about Pushkar...it can be about Havana old taxis or the technique in panning...it can be about food or women. Some can be of basic techniques, while others can be more esoteric.

For instance, here's the intro to the lesson of day 85:

"My wide-angle lens is far from my most used one. But I always carry it in my bag because when the right moment occurs, I wouldn’t want to be without it. The wide angle will help you create a feeling of presence."

Jens Lennartsson works as a travel and lifestyle photographer represented by Wonderful Machine, and he's based in Malmö, Sweden.

Be sure to visit his travel and lifestyle photography website, and don't miss The Ethnicity Project.
 

Thursday, February 21, 2013

My Three Season Camping and Bushcraft Gear

It has been almost a year since I did a post about the gear that I carry. You can see that post here. Since then I’ve been getting a lot of questions about my current gear so I figured I would put together a post. This one will focus on my three season gear. By three season I mean the gear I would use for trips where the temperature will be above 32F (0C). Anything below that, and I would have to make some modifications.

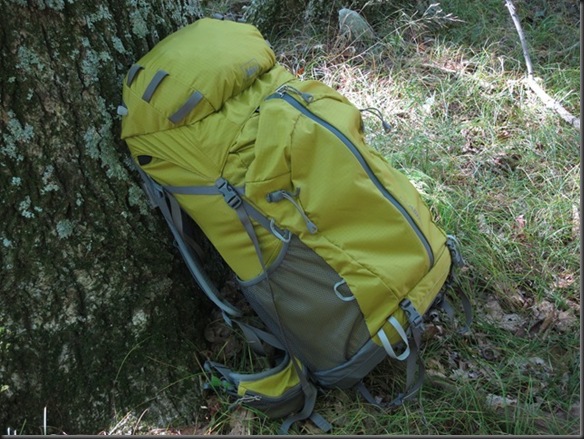
So, first, let’s start with the backpack that holds all of the gear. My current backpack is the REI Flash 62.
05333 

It is a relatively lightweight internal frame pack, weighing in at exactly 3.0 lb for the medium length pack. It has a 62 litter capacity, which is overkill for my three season gear. In fact, I use the same pack for most of my winter trips as well. A 45 litter pack would fit all of the gear you see here. The main compartment of the REI Flash 62 (excluding pockets) is about 50 litters which does the job well.

When it comes to packs, I like ones that are appropriately sized for the gear. I don’t like strapping things to the outside, hanging things to teh pack, or adding pockets, pouches or anything like that. If my gear doesn’t fit inside a pack, I get a larger one.

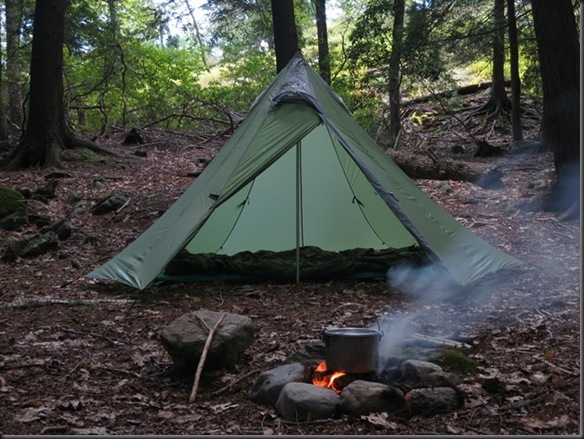
For shelter I use the GoLite Shangri-La 3 flysheet. The tent itself comes with a floor and mosquito netting which gets inserted under the flysheet, but I do not use it. The only components I use from the tent are the flysheet, center pole and the tent stakes.
16733

The Shangri-La 3, as I have it set up weighs 2 lb 3 oz. Out of that weight 11.2 oz is the center pole. Separate from that weight, I use six tent stakes which weigh a combined 5.1 oz, bringing the total of the shelter system to 2 lb 8.1 oz. I have been very happy with this shelter. I like the open floor design which allows me to treat it very much like a tarp, with the added wind and rain protection.

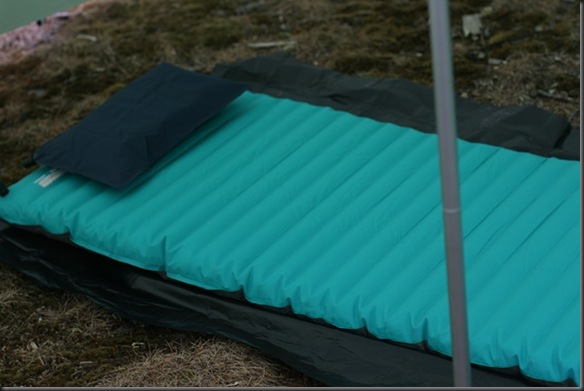
My sleep system is comprised of several components.
1543

The first thing on the ground is a plastic sheet (an opened up trash bag) weighing 1.8 oz. It serves just as extra ground cover in case my sleeping bag hangs over my sleeping pad and touches the ground. On top of that I have the Thermarest NeoAir All Season Pad. It provides more insulation that one really needs for three season camping with an R value of 4.9, but I use it all year round. It offers good comfort, plenty of insulation and folds down to the size of a Nalgene bottle. It weighs 1 lb 5.6 oz. I carry a repair kit for it that weighs an additional 0.5 oz. On top of the pad I have my sleeping bag. For my three season trips I use an old green/patrol bag from an army surplus MMS system. It is not the lightest, but works well enough. I also like that I can have my dogs in there without worrying about them ruining it. The bag weighs 2 lb 5.3 oz. It is held in a waterproof Sea to Summit stuff sack that weighs 4.7 oz. The last component is a small inflatable pillow, the Kooka Bay Kookalight pillow, weighing 1.2 oz. The total weight of the sleep system is 4 lb 3.1 oz. 

This covers the big heavy items. The next one to look at is water storage and filtration.
1953

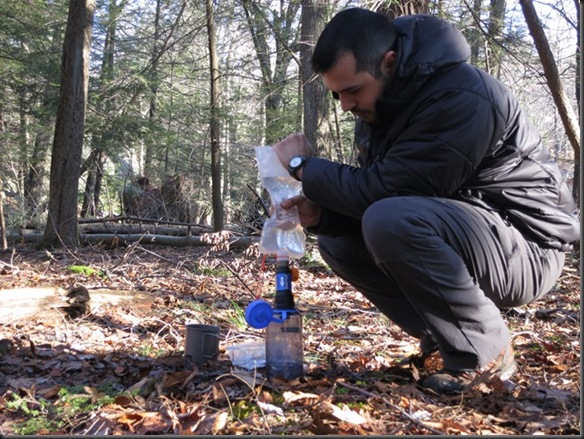
You can see most of the components in the above picture. For water storage I use one Nalgene 1L bottle and a 2L Platypus bladder. I don’t drink from it as a hydration system, but just use it for storage of water. The Nalgene bottle weighs 6.2 oz, and the Platypus bladder weighs 1.4 oz.
112

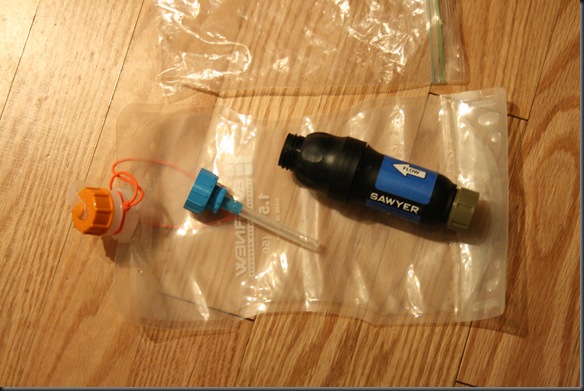
My filter is the Sawyer Squeeze Filter. I have replaced the bag that it comes with with an Evernew bladder, and have added a pre-filter and a back flush attachment. The filter itself weighs 3.0 oz. The Evernew 1L bladder where the dirty water is stored weighs 1.2 oz. The pre-filter weighs 0.2 oz and the back flush mechanism weighs and additional 0.3 oz. The total weight of the filter system, stored in a plastic Ziplock bag is 5.0 oz.

The next set of items to examine is my cook kit.
093

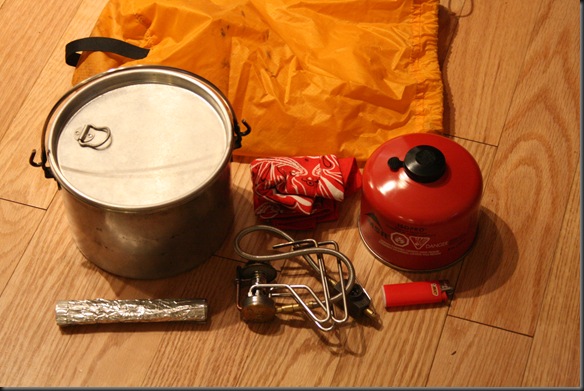
The pot I use is the Open Country 2 Qt pot. It is made out of aluminum, weighs only 7.7 oz, and is one of my favorite pieces of kit. I could get away with a smaller pot, but I like that I can boil things in it without them boiling over, and I use it in winter as well to melt snow. The stove I use is the Kovea Spider. The stove itself weighs 5.9 oz. The weight of an empty canister (since we are doing the base weight here) is 5.0 oz. With the cook system I also carry a 0.4 oz aluminum foil windscreen, a 0.4 oz lighter, and a 1.0 oz bandana. It all goes into a stuff sack that weighs 0.6 oz. The total weight of the cook system is 1 lb 5 oz.

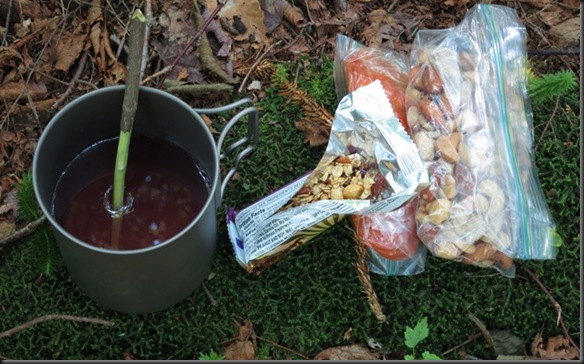
Separate from the above cook kit I have a titanium cup that nests with my Nalgene bottle. It is the Backcountry Stoic Ti Kettle, which weighs 3.1 oz.
1493

This pretty much covers all of the large items I have and use. I also have a waterproof bag with other smaller items.
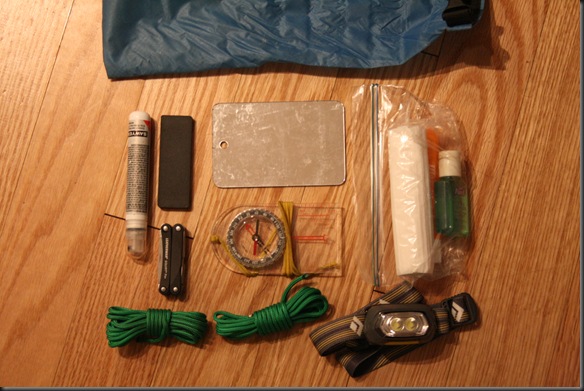
040

I’ll try to go through all of the items. The bag itself weighs 0.8 oz and is a Sea to Summit stuff sack. In the Ziplock bag on the left I have some toilet paper (0.4 oz, but obviously the amount varies), toothbrush (0.4 oz), and a bottle of soap, which weighs 1.0 oz when full. I also have a Black Diamond Gizmo headlamp that weighs 2.2 oz, a mirror which weighs 0.7 oz, a basic compass that weighs 1.0 oz, a DC3 sharpening stone weighing 1.3 oz, a Leatherman Squirt multitool weighing 2.0 oz, a spray bottle of DEET, which when full weighs 1.0 oz, and about 50 ft of rope, weighing 1.1 oz. The rope is not parachord, as I find parachord to be overkill as far as rope needs. The total weight of the bag with these items is 11.8 oz. 

I also carry a first aid kit. It is relatively small, and is designed to deal with injuries that I may get and am capable of handling my self.
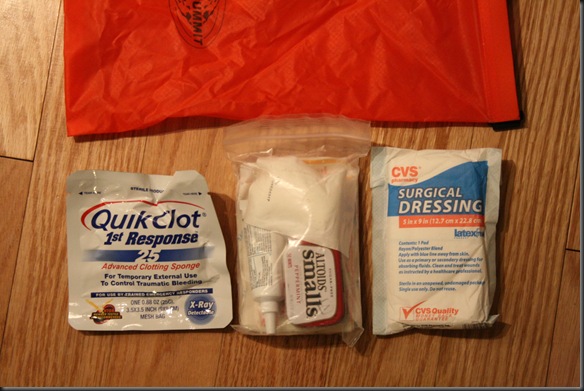
061

The kit has two components. One is designed to deal with heavy bleeding, and the other is designed for minor injuries. The two items you see on the sides are designed to stop heavy bleeding. One is a surgical dressing. It weighs 0.4 oz. The other is a Quick Clot sponge, which stops heavy bleeding by causing clotting. The sponge weighs 1.1 oz. In the middle you see a small bag with items designed for smaller injuries. It contains medications, Neosporin, gauze, band aids, etc. Including the stuff sack, the whole first aid kit weighs 5.4 oz.

The last item I carry in my pack is a Bahco Laplander folding saw.

m (3)

It weighs 6.4 oz and provides significant cutting capacity for that relatively low weight. It has come to be a fairly standard equipment choice, and for good reason. You have probably noticed that I am not carrying an axe or hatchet. I did until very recently, but these days I am trying to go without one. It just wasn’t justifying its weight. Over the years I have started using smaller and smaller fires, especially since I camp alone so much. I find that a knife and the saw are more than enough to process the firewood I need. Whenever I carry an axe, I seem to just be looking for reasons to use it without actually needing it. It is a good tool to have, but when you carry everything on your back, every tool has to justify its weight in terms of practical use, not just theoretical one.

So, when we add everything up, we get a total base weight of all the above gear of 13 lb 7.5 oz. It is not an ultralight set up, but then again, it was never intended to be one. There are a lot of items where the weight can be reduced further if you so wish. The cooking kit can be much smaller. The sleeping bag and sleeping mat can also be reduced in weight, and if you can do that, you can probably move to a lighter frameless pack. However, I carry the gear you see above because  I like it and it serves me well.

Aside from the items in my pack, I have a few more things in my pockets.
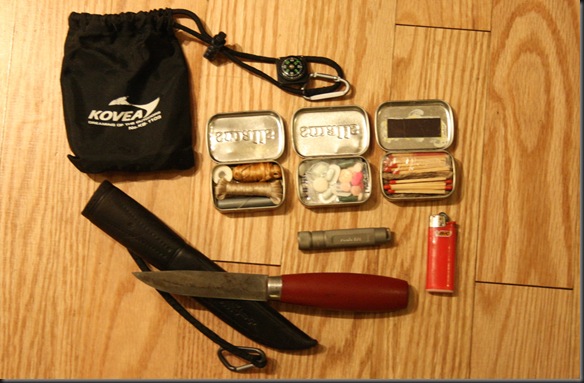
010

In my right pocket I carry the Mora #2 knife you see above. I keep it in a leather sheath that I got from another knife. The knife together with the sheath weighs 4.0 oz. The Mora #2 is my favorite knife in terms of blade and handle design. Its only downside is that it is not a full tang knife, so it has some strength limitations.

In the other pocket I carry a small pouch (actually from my Kovea stove), in which I keep a Fenix E01 flashlight, a mini BIC lighter, and three Altoids Smalls tins. One of the tins holds my repair kit with a few fishing hooks thrown in on the bottom. The second tin holds some medications I commonly use and water purification tablets. The third tin contains tinder (waxed jute twine) and matches. On the pouch itself a have attached a mini compass. The whole pouch weighs 4.5 oz.
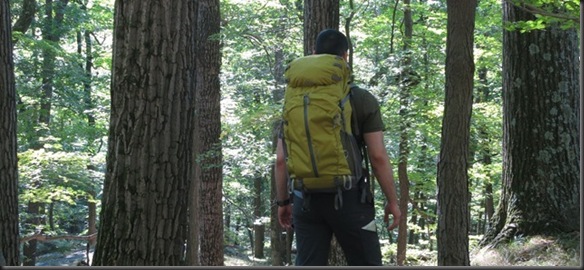
033233

So, when the weight of the contents of my pockets is added to the overall pack weight, I get a total combined weight of exactly 14 lb. Of course, the actual pack ends up being heavier when we add perishable items like food, water and fuel. A full canister of gas will add another 8 oz. Each liter of water will add another 2 lb, and a day worth of food is between 1 or 2 lb. Additionally, I may have some articles of clothing which I would put in the pack when I am not wearing them – some extra insulation, rain jacket, hat, extra socks, etc. I have not included them in the base weight of the pack because they are not always in it. I will do separate posts on clothing. However, even though the clothing is not included here, the backpack itself is large enough to hold all the clothing other than what I would be wearing all the time.

That’s about it for my three season gear. It is what I would consider fairly luxurious. I certainly have not spared many comforts. The weight can easily be reduced if you are willing to sacrifice some of those luxuries. You certainly don’t need such a large pot or stove. You don’t need such a heavy sleeping pad, nor do you need such a large shelter. A down bag will significantly reduce the weight and bulk. However, each one of us has to strike that balance between how much we are willing to carry, and what items we would like to have with us. For now, this is mine.