Sunday, July 31, 2011

POV: In Praise Of Foundry Photojournalism Workshop


As this blog's followers and readers know, I attended the Foundry Photojournalism Workshop in Buenos Aires as a faculty member, and decided I'd jot down my thoughts as to how it progressed and developed.

I attended all four Foundry workshop (Mexico City, Manali, Istanbul and now Buenos Aires), and it was by far the best in terms of organization and infrastructure. Whilst there may be a difference of opinion among faculty members as to the strength of the students projects as presented during the workshops, we all agreed that the organization, the behind-the-scenes work and the two venues (Motivarte and Arte y Arte) were terrific.

The photographers in the faculty were lauded for generously sharing their knowledge and time, but I think the unsung heroes of Buenos Aires' Foundry were its staff, administrators and the local volunteers who made it a wonderful success.

Eric Beecroft, as the visionary force behind the Foundry Workshops, deserves singular praise. He had an idea 4-5 years ago, and made it a reality despite enormous obstacles. As they say, Eric pushed water uphill, and made it to the top. With him, and deserving many kudos for the success of the Buenos Aires workshop are Mansi Midha, Kirsten Luce, Gabriel "Morty" Ortega, Tiffany Clark, Jen Storey, and Hugo Infante. They are excellent photographers in their own right, and you can see their individual biographies here.

Despite their various bouts with tenacious flu, exhaustion and long hours, the staff and local volunteers worked around the clock, and deserve enormous credit for the success of this year's Foundry. Here's to you...and a standing ovation for a well done job!

The students' presentations were shown on the last evening, and having strict time limits for each made it much easier to appreciate. The audience was delighted to have seen such powerful, compelling, creative, imaginative and in a couple of cases, tongue in cheek work.

I will only mention the faculty by saying that, as usual, all instructors exerted tremendous efforts to share their technical knowledge with their classes and beyond. There were incredibly interesting panel discussions, and I, for one, was stunned at some of the instructors' candor in describing the toll their jobs have had on their lives...and yet, they participated in this workshop just because they want to give back.

Finally, a word about Buenos Aires...the combination of the best beef, lamb and chorizos (especially at Glumy and Criollo on Serrano square) in the world, excellent wine, bewitching tango music, and the seductive milongas...as well as some of the most attractive women (and I'm told, handsome men) I've seen, also contributed to it being such an unforgettable experience.

The 2012 Foundry Photojournalism Workshop will be held in Southeast Asia....Viet Nam is on top of the shortlist. Keep your eyes and ears open for the eventual details...and be part of it. You won't regret it.

Saturday, July 30, 2011

Terri Gold: Into The Mists of Time

Photo © Terri Gold-All Rights Reserved
Terri Gold joined my Tribes of South Rajasthan & Kutch Photo~Expedition™ last year, and is now showing her terrific infrared images about life in Guizhou (China) in an exhibition entitled “Into the Mists of Time", of which the above image is part of.

Julie Keyes is curating and presenting the exhibition at 4 North Main Gallery, which is located at 1 North Main Street in Southampton, New York, and will be opened for viewing on July 30th, 12-7PM and July 31st, 12-5PM. 


From the exhibition's press release:

Terri Gold’s lifelong body of work “Still Points in a Turning World “focuses on Asia’s vanishing tribal heritage and has been widely published and exhibited. Recently, she was featured in aCurator Magazine and Lenscratch and was a winner in the Planet Magazine and London International Creative Competitions. Gold’s work is interpretive in nature and incorporates the use of infrared light and the invisible light spectrum. She is interested in the myriad ways in which people find meaning in their lives, how an individual explores his or her existence through their traditions.


So if you're in the Hamptons this week-end, don't miss it! Teri's images are unique and well worth your time.

Friday, July 29, 2011

An Old Wood Burning Stove

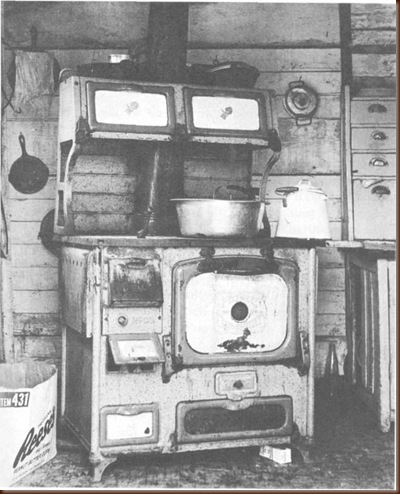
I ran across this picture in an old issue of Fox Fire. I wanted to share it with you because it reminded me of the stove we had at my grandfather’s place. In fact, it looks almost identical. I guess designs don’t change all that much even across continents. 

untitled

For those who have never seen one of these stoves, the wood goes into one of the small doors on the left. The bottom one is for the ashes to collect. The cooking is done in the two compartments on the right just like in a modern stove. The wood also heats up the top of the stove, and the top “burners” can usually be opened to reveal the flame.

Indu Antony: It's A Beautiful World Outside


Indu Antony attended the Buenos Aires Foundry Photojournalism Workshop which just ended a few days ago, and chose the incomparable Maggie Steber as her instructor. A wise decision...and one which speaks volumes about Indu's passion for photojournalism.

She also chose me to review her phenomenal portfolio...which I did, spending a very long time doing so, forgetting I had other photographers waiting for me. Her multimedia photo essay on the destitute and the homeless in a Bangalore shelter is so compelling and sensitive that I watched it twice...slowly. You will too.

"Indu, you should marry a dentist and open a dentist clinic and have two boys who will be successful dentists too!". I decided to disobey her and follow my dream of being a photographer. I have been chasing colour purple ever since through my images."
Indu hails from Bangalore and is drawn to documenting the unprivileged, the homeless and those who lack a voice.  Her It's A Beautiful World Outside was photographed in a Bangalore shelter which mainly houses psychologically ill people who, like us, have dreams and wishes.

From the sight-impaired to the physically handicapped, all believe they will one day walk out from that shelter into that beautiful world "Outside". In her multimedia piece, Indu fused their portraits to photographs of their dreams, and recorded their voices telling us of their hopes and wishes.

Powerful...emotional...and sensitive.

Thursday, July 28, 2011

Basic Axe Use Part 4: Carving

This is the last part of the series on basic axe use. I decided to finish it with a couple of ideas about carving with an axe. Many people ignore this ability of the tool, but it can drastically decrease the time it takes to complete a carving project. Since this is a basics video, I’ve only used it to show some of the possible things you can do with an axe. There are many other carving techniques that will come into use for the more advanced axe handler.

Part 4 of 4:

Some things that were not mentioned in the video:

1. In order to be able to carve with an axe as you would with a knife, your axe has to be just as sharp as your knife.

2. If you are carving and the wood on which you are working starts splitting, turn it around and try it from the other direction. Often the grain alignment will work to your advantage.

3. Carving, planing, and general wood working is more easily done with the handle still on the axe. It has become fashionable in recent times to use a tomahawk from which the handle can be removed and the head alone used for carving. That significantly limits the carving ability of the axe.

Jon Goering: Ethiopian Orthodox Christianity

Photo © Jon Goering-All Rights Reserved
I am certainly glad Jon Goering chose me to review his multifaceted portfolio during the Foundry Photojournalism Workshop in Buenos Aires a few days ago, and so will you when you view his black & white images of Ethiopian Orthodox Christianity.

I guarantee you'll find these beautiful images very compelling, and extremely well composed.

Jon is a photojournalist living near Birmingham, Alabama and is the staff photographer for Shelby County Newspapers. He was awarded third place by the Hearst Journalism Awards program for News/Sports in 2008/2009 and honored for his photography of Ethiopia. At CPOY64 he was awarded two honorable mentions awards, one for International Picture Story for a story on the children of the Chinandega, Nicaragua landfill, and one for Portrait. The project was later selected by the photojournalism collective LUCEO as one of ten finalists for their student project award. Jon garnered other awards, and I predict he will continue to impress us with his future projects.

In Buenos Aires, my review of Jon's images (viewed on his iPad) quickly evolved into a conversation about Ethiopia and the profound religiosity of its people. I can't recall for certain if I told Jon this, but when looking at his images, the sinking feeling in my stomach signalled I had missed much by photographing only in color when I was in Lalibela during Timket...but it was in 2004 and what did I know then?!

So I'm happy Jon is smarter than I was, and did realize that black & white photography enhanced his visualization of Ethiopia's beautiful Christian rituals.

Wednesday, July 27, 2011

Basic Axe Use Part 3: Splitting

This is part 3 of the series on basic axe use. Here I cover some simple splitting techniques for when you are working with pieces of wood which have been cut with an axe.

Part 3 of 4:

Some things that were not mentioned in the video:

1. Just like I have said before, the type of wood with which you are working will greatly change how easily you will be able to do the job. It is not always a hard vs. soft wood distinction. Some woods just split much more easily than other.

2. Try to work with pieces without knots, as they will be easier to split.

3. Remember that while the ground is a solid surface, it actually has quite a bit of give/springiness, which will absorb a lot of the energy of an impact. Make sure to place the piece of wood you are splitting on a solid log.

David Lazar: The Monks Of Burma

Photo © David Lazar-All Rights Reserved
After the 10 days or so I spent amidst photojournalism work, I thought I'd revert to pure travel photography through the work of David Lazar; a collection of absolutely gorgeous portraits of Burmese monks which are certain to thrill and impress the legions of photographers who traveled to this magnificent land, and who especially favor simple portraiture work. I know quite a number of those photographers, and also know of a few who will be traveling soon to see for themselves what Burma has to offer.

Not only are the portraits just spectacular, but the gallery's presentation is also superb. The gallery of large images is on the Visions of Indochina website.

David Lazar is a musician and photographer from Brisbane, and who loves traveling and capturing moments of life through photography. He has won a number of awards and recognitions for his photography which include Shutterbug Awards 2011, Kumuka Travel Photo Contest 2010, Lonely Planet Photo Competition 2010, Asian Geographic - Poetry in Motion Competition 2010, Intrepid Photography Competition 2009...and many more.

I'm not at all surprised. David's photographs are the type that win awards consistently.

Amy Winehouse: Unique Talent


Here's Amy Winehouse in an acoustic version of Love Is A Losing Game. She sang this sad song with only a solo guitarist, and it demonstrates her impressive range of vocals. She had a incredible future, but it was not to be.  


One of my favorites is her "Me And Mr Jones"....another great song.

(Via One Voice-One Guitar)

Tuesday, July 26, 2011

Basic Axe Use Part 2: Limbing and Bucking

This is the second part of the Basic Axe Use videos. Here I discuss bucking a tree, which uses a technique very similar to what you saw in the felling video.

Part 2 of 4:

Some points that were not mentioned in the video:

1. While in this video I spoke about how different types of trees have very different properties when it comes to chopping and splitting, that is also true about the distinction between green wood and dry wood. Green wood is much easier to chop through than dry wood. Dry hardwood will usually be the most time consuming to go through, although it tends to be the best fire wood.

2. You may have seen professionals and axemen in the professional circuits using a bucking technique where they stand on top of the log and then chop between their legs. While that is an efficient technique, it is also very dangerous. As such, I do not recommend it unless you are an expert. There is more than one guy nicknamed “stumpy” in the competition circuits.

3. These days bucking is rarely done with an axe. The crosscut saw has taken over that job because it can do it faster, and wastes less wood. That being said, the axe can be an effective tool for the job. As you saw, it took me two (2) minutes to chop through a six (6) inch log of dry oak.

4. As you can see at the end of the video, one of my swings does not bite into the wood, but actually glances off. Always think ahead, and plan on where the axe will end up if you miss. A sharp axe with a thin bit will reduce such glancing.

5. Notice that when the log moves during bucking, I reposition my whole body before I continue swinging the axe. That way I keep my swing exactly the same. Do not try to adjust the distance between you and the wood by bending your arms, as it will ruin your technique. Adjust either by relocating your body, or moving your hips to adjust the positioning of the axe.

Gardelito, The Tango Performer Of San Telmo

Photo © Tewfic El-Sawy-All Rights Reserved (Click To Enlarge)
After the phenomenally successful Foundry Photojournalism Workshop in Buenos Aires ended, and the raucous party(ies) waned in the wee hours of the night (or more accurately with the first rays of the sun), some sleep-deprived souls joined the Sunday throngs in San Telmo.

San Telmo is the oldest neighborhood of Buenos Aires. It is a well-preserved area and is characterized by its cafes, tango parlors, antique shops on cobblestone streets, which are often filled with artists and dancers.

Mervyn Leong, Syed Azahedi, Mariana Castro and myself met in the San Telmo main square where we ambled for a few hours, photographing the stalls, the vendors, the customers and the flaneurs. To the side of the square, we stumbled on a solo tango performer who called himself Gardelito, presumably after Carlos Gardel who was a singer, songwriter and actor, and is the most prominent figure in the history of tango. For one of his songs, click here.

Gardelito is an old hand working the crowds, sings and plays the guitar quite well and knows how to market himself. He displayed his washed out photographs on a wall behind him, and claimed he was interviewed by all the world's major newspapers.

As a footnote, there's little doubt in my mind that the Buenos Aires Foundry Photojournalism Workshop was the best one organized so far since it was started by Eric Beecroft in 2008. I will post more on this in a few days.

Monday, July 25, 2011

Basic Axe Use Part 1: Chopping

So, I finally got the next set of videos done. I know a bunch of you guys emailed me asking for a video on how to use an axe. This series is intended to show some basic techniques, or at least show them to the best of my abilities.

Part 1 of 4:

Unfortunately, some of the footage I had did not come out well, so I had to leave it out of the video. Some things you may want to consider that are not specifically addressed in the video:

1. As you can notice, the bottom section of the V notch is almost horizontal. To make it an ideal V, both the top and bottom cuts on the V would be at a 45 degree angle. Unfortunately, it is very hard to make an upward facing cut on the bottom section of the notch. It can be done with a hatchet or smaller axe, but becomes more difficult with larger axes. The cut actually does have a slight bevel facing up towards the center. This makes it easier for the axe to cut the wood fibers.

2. Don’t think that you need to do the exact same things for every tree this size. Different types of wood perform differently. With a softer wood, or a tree that is not dry, you may very well be able to get through a tree this size without having to make a back cut.

3. As you have noticed, I don’t use any eye protection. I never have, and I do not like to carry any into the woods. However, if you want to be on the safe side, bring a pair of safety glasses. There is nothing wrong with being safe.

The full set of videos is now up on YouTube, but I will post them here over the next few days. 

Friday, July 22, 2011

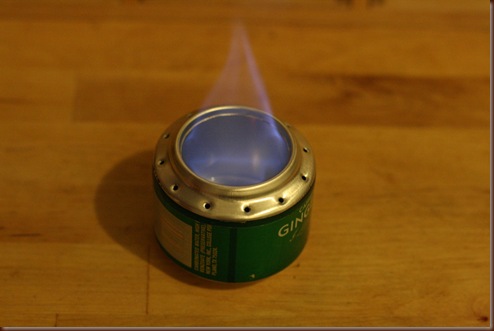
DIY Alcohol Stove-The Open Jet Soda Can Stove

Some time ago I showed how to make a DIY version of the commercially available Brasslite Turbo II-D alcohol stove. You can see that post here. Today I want to show you a DIY version of another commercially available alcohol stove, the Trangia. This design has been around for a very long time, but in case you don’t know about it, here it is:

Start with two regular soda cans.

005

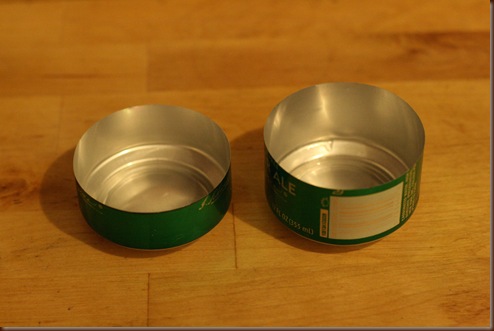
Cut them down so that one is about 3/4 to 1 inch high, and the other can is a little bit shorter. Here we are only using the bottoms of the two cans.

028

Take the shorter can, and cut out the center. Make sure that you leave the lip that goes down intact. Simply cut out the smooth concave section from the bottom of the can. This can be done by just running over it repeatedly with a sharp knife. The aluminum is thin, and will eventually cut. Also, drill 1/16 inch holes around the central opening, spaced about 1/4 inch apart.

017

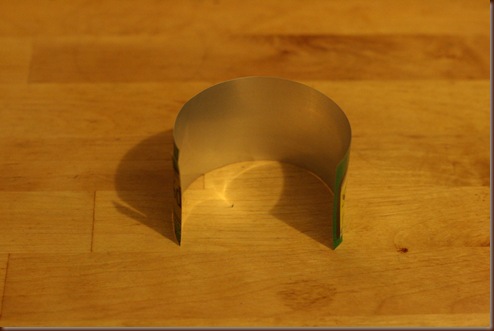
Now take the remains of one of the cans from which you cut out the original two section, and from the side, cut out a piece that is about 3/8 taller than the tall can cutout you made earlier.

032

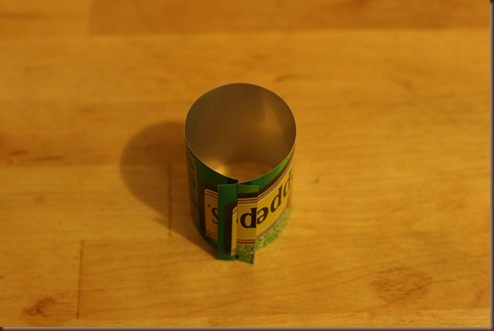
Make slits in the ends, and fold the piece of metal into a cylinder.

040

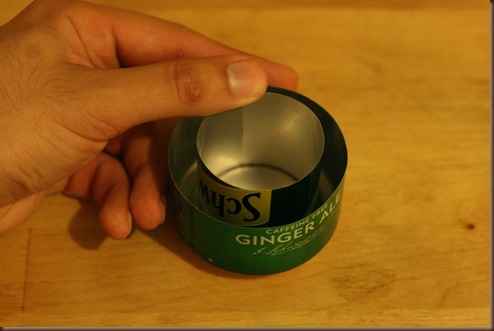
It has to be just large enough so that it fits in the tall soda can cutout, and aligns exactly in the groove at the bottom of the can.

042

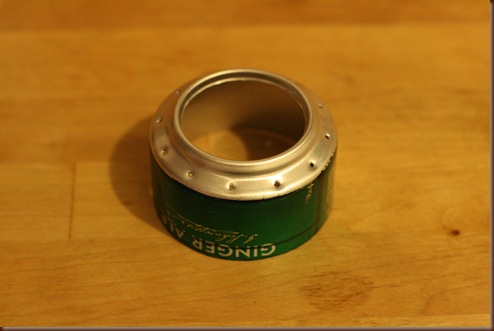
Now, take the shorter can, in which we made the holes earlier, and fit it inside the taller can. Make sure the inner cylinder lines up with the grooves of the top and bottom can (the reason why we left the lip on the shorter/upper can). This is the hardest part of this project. Some people like to use a lubricated full can as a die to stretch out the bottom can cutout, but either way, it requires some playing around. The final result should be this.

046

Put some alcohol it is and light it. At first the flame will be low just like on the Trangia.
056

In a few seconds the stove will heat up and bloom.

065

The stove weighs 0.4oz, and burns 12 minutes on 1 ounce of alcohol. It will boil two cups of water in about 9 to 10 minutes. By adjusting the holes on top, you can get stoves with different burn times.

Wednesday, July 20, 2011

Buenos Aires: The Tango Dancer Is Waiting

Photo © Tewfic El-Sawy-All Rights Reserved

Well, we're midway through the Foundry Photojournalism Workshop in the Argentine capital of Buenos Aires, where the food and wine are remarkable, the women are gorgeous and the music is superb. A photojournalism workshop with intense classes given by top photographers, and interspersed with forays into the night life of this non-sleeping city! It can't get any better.

A group of us went last night to the Salon Canning on Scalabrini Oritz, where we witnessed some of the finest tango musicians, and impressive dancing from the patrons of the establishment.

Although I photographed the dancers, this image of a woman waiting to be asked to dance is the one that remains with me from last night.


Alone in the Wilderness Part II

Most of you are probably familiar with the movie Alone in the Wilderness. It has been around for a long time and has been on television quite a few times.

It depicts the life of Dick Proenneke, who is 1967 decided to go into the Alaska back country and live there in a log cabin he built himself. The footage in the movie is shot by Dick himself. If you have not seen it yet, it is well worth your time.

Well, now a second part has been released, featuring footage that was not included in the first movie. It picks up about a year after he moves to Alaska, and actually gives a more compete glimpse into how he managed to live in such isolation. Here is a clip from the movie:

You can find all the movies made by or about Dick Proenneke here, including this new movie. 

Tuesday, July 19, 2011

JAMIE OLIVER'S SLOW ROASTED PORK BELLY


Jamie's recipe for pork belly is my favourite and one I have cooked since his book, Cook With Jamie, was released in 2006.

This is an easy, no fail recipe, and only requires the best pork you can afford. The pork in Jamie's recipe is cooked on a bed of fennel but if you don't want to use the fresh fennel then the pork will still taste fabulous.

This is the tastiest belly pork ever, it is coated in a mixture of bashed up fennel seeds and salt and after an hour or so a bottle of white wine is added to the roasting tin. Long slow cooking is also the secret to perfect belly pork and not one to be rushed, as with all good things!

I always score the pork myself because invariably the meat has never been scored very well, even though I always buy it from the butcher. We have a huge meat knife hidden away in the cupboard, which is a bit scary, but it makes easy work of scoring meat.

You will fall in love with this recipe, just as I have, and your kitchen will be full of the most beautiful aroma's. I know once tried there will be no turning back.....


Here is the original recipe, for the two of us I mostly buy a 1.5kg joint because I like to have some leftovers.

Serves: 6-8

2kg pork belly on the bone, 2 tablespoons fennel seeds, sea salt and black pepper. 4 fennel bulbs, each cut into sixths, herby tops removed and reserved, small bunch fresh thyme leaves picked, 5 unpeeled cloves of garlic, olive oil, bottle of white wine

1. Preheat the oven to its maximum temperature. Score the skin of the pork.
2. In a pestle and mortar bash up the fennel seeds with a tablespoon of salt until you have a powder, then massage into the scores of the skin.
3. In a roasting tin toss the fresh fennel with the thyme, garlic, a good splash of oil and some salt and pepper. Place the pork belly into the preheated oven. After 10 minutes turn the oven down to 170°C/325°F/Gas 3 and roast the pork for a further hour.
4. When the hour is up, take the tray out of the oven, pour away any excess fat, add the white wine and pop back in the oven for another hour.
5. Remove the fennel and keep warm whilst you put the pork back in for a final hour until the skin is golden and crisp and the meat is melt in the mouth tender. If the wine evaporates during the cooking time, add a splash more wine or water to loosen and make a light gravy.
6. Let the pork rest for 10 minutes. Carve into large chunks and serve with gravy and the fennel.

Delicious!

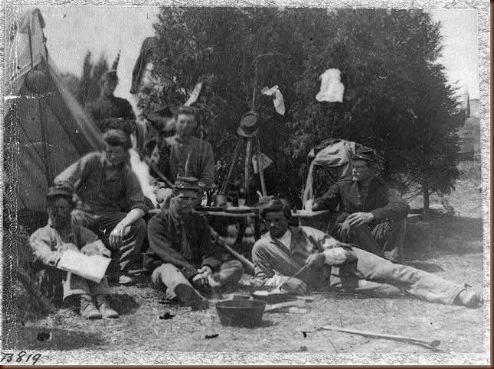
23rd New York Infantry c. 1861

This is a civil war era photograph, depicting members of the 23rd New York Infantry in camp. The photograph dates from between 1861 and 1865.

3a03824r

Note the axe on the ground in front of the soldiers. It appears to be a Dayton pattern boy’s axe with a curved handle. So far all the poll axes I have seen from the Civil War have had well made curved handles. This leads me to believe that by this time the curved handle was predominant.

It is often said that the curved handle came into use around the 1850. Either it made very significant gains in the market over the ten year period before the Civil War, or the introduction was more gradual and started earlier. Of course this is all speculation.

Monday, July 18, 2011

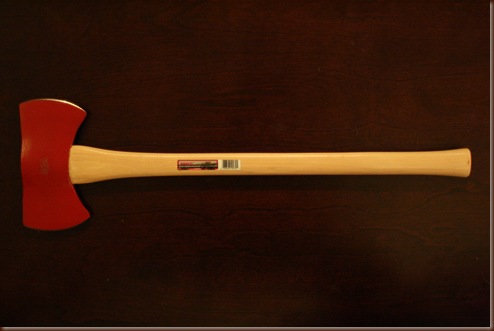
Barco Kelly Woodslasher Michigan Double Bit Axe Review

I have been looking for a good cruiser size axe to review for some time now, and I finally found one that was worth the money. It is the Kelly Woodslasher, currently being produced by Barco Industries, who have owned the Kelly brands since 1987.

014

Specifications:
Manufacturer:
Barco Industries Inc.
Axe Head Weight: 2.5 lb
Axe Length: 27 inches
Axe Head Material: Unknown carbon steel
Handle Material: Hickory
Cost: $56.00

zx (14)

In terms of cost this is a very well priced mid range axe. A $56.00 axe of good quality would be a bargain. Of course, if it falls short, the price is not insignificant.

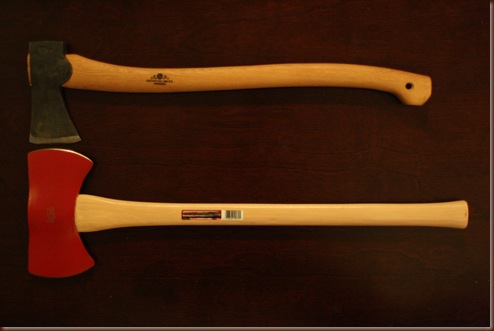
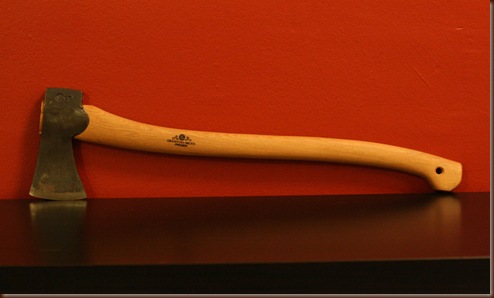
Since there aren’t any particularly well known double bit axes on the market to which I can compare this one, I figured I would just take some pictures of it next to the Granfors Bruks Scandinavian Forest Axe, just for the size comparison. Clearly the Barco axe is a bit larger, resembling a boy’s axe is size.

020

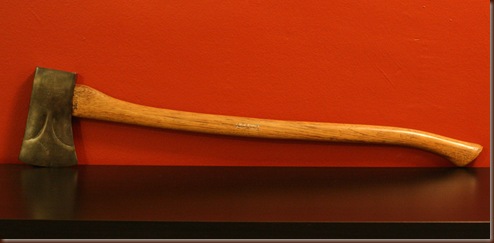
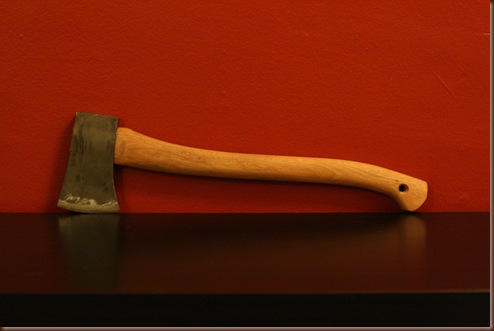
The handle is about 27 inches in length (even though on their website, they have is listed as a 36 inch handle by mistake). The grain on this one, just like the other Barco axes that I have seen is perfect. The handle is a good size and well shaped. It did have a light coat of varnish, which I ended up removing. The head was attached to the handle with just a wooden wedge.

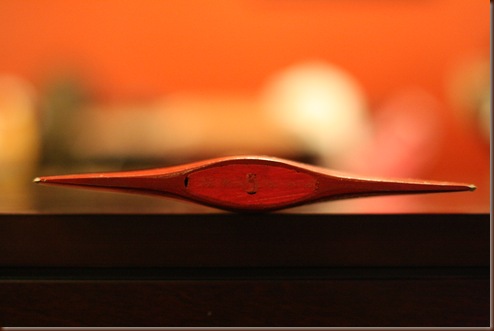
The head itself is a Michigan pattern double bit. The weight is listed as 2.5 lb, but it might be a just a bit lighter judging by the feel of it. For those of you who appreciate and collect old (pre 1950s) axes, this one will certainly be a very pleasant surprise. It is a very old school head design. Just like those older axes, the cheeks are convexed from heel to toe, a feature no longer seen on most axes. The head also comes completely unfinished. There is a center line put on each bit, but they have not been ground in any way.
039

That being said, the bits are not too thick, and can be brought to the desired thickness with a file. Overall, the head shape is excellent. Working on this axe is the same as if though you had found a new old stock Kelly Flint Edge. Of course, if you are looking for an axe that you can just take out of the box and use, this one will not be for you. Just like with those old axes, it is unfinished, and requires some degree of knowledge to bring it into working shape.
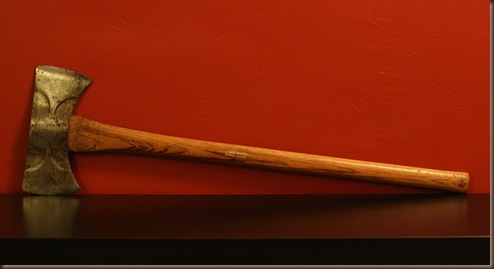
Overall, this is one of the best buys I have made in a long time. It was well worth the $56.00. When I pulled it out of the box, it was as if though I had managed to win a bidding war on ebay for a vintage axe in perfect condition. That being said, be aware that just like those vintage axes, it comes unfinished form the factory. If you are not comfortable with grinding your own axe, I would pass up on this one. You can buy the axe directly form Barco here

New: Zoom H2n Handy Recorder


Since I'm about to start teaching my class Multimedia For Photographers at the incomparable Foundry Photojournalism Workshop, I am glad to have caught the news that Samson (Zoom) has announced the H2n, a portable audio recorder that incorporates five built-in mics, and one 3.5mm external mic input, for a variety of sound capture scenarios, and for the anticipated street of $199.

It will come with a bunch of accessories including an audio editing software, and an optional accessory pack with lots of goodies.

It may well be time to retire my Marantz PMD620 after all! But it will have to do until the H2n is released in September....which may allow me to get it before I travel to Kolkata on my Cult of Durga photo expedition.

Sunday, July 17, 2011

Foundry Photojournalism Workshop Is Live!

Photo © Tewfic El-Sawy-All Rights Reserved
I've been on Buenos Aires since Friday morning, and I've already seen tango street performers, as well as spent many hours at a genuine milonga observing the traditional rituals and procedures that govern the tango, the national dance of Argentina.

The Foundry Photojournalism Workshop 2011 has just been inaugurated by a lunch for the faculty, and approximately 130 students are converging towards Motivarte, where the official introduction of students-instructors is scheduled in an hour or so.

Eric Beecroft, in the manner of the Roman emperors, declared the workshop open by saying 'let the games begin'. He didn't really say that...but his speech was infinitely more eloquent.

I ought to get ready to meet my students.

Saturday, July 16, 2011

Chocolate Covered Coffee Beans Cupcakes


It seems that once I get a theme going, I just don't know when to stop. Not so long ago, it was cupcakes and flowers and now it is cupcakes and chocolate.

Mr W and I went on a shopping spree for cake toppings and to make the cupcakes even more calorific, I have a box overflowing with wonderful chocolate cake toppings. The great thing about this theme is, I/we get to eat any decorations that are left over.

I made a vanilla cake base, piped with buttercream and simply topped them with these fabulous chocolate covered coffee beans from Waitrose.


You will need: A muffin tin lined with 12 cupcake cases

115g softened butter, 115g caster sugar, 115g self raising flour, 2 eggs, 1-2 tablespoons milk, 1 teaspoon vanilla extract.

1. Beat together the butter and caster sugar until soft and fluffy. Add the eggs slowly to the mixture, together with the vanilla extract and milk. Fold in the flour.
2. Divide the batter between 12 cupcake cases and cook in a preheated oven 180°C for 20-25 minutes until golden.

Buttercream Icing


250g unsalted butter, 500g icing sugar, 1 teaspoon vanilla extract, 1 tablespoon hot water

Simply mix all the ingredients together until light and fluffy.

Friday, July 15, 2011

An Introduction to Axes Part 3: Variations and Features of the Felling Axe

This is the third part of the Introduction to Axes series. Here I go over some other features of the felling axe such as different sizes and design options.

Part 3 of 3

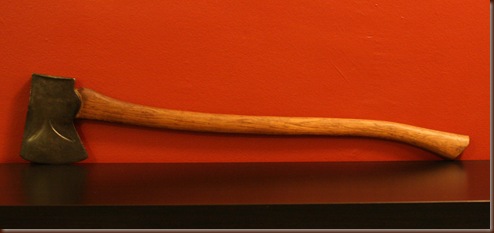
You saw this axe in the first part of the series. It is the True Temper Kelly Perfect Dayton patter axe. It has a head weight of 3.5lb and a handle length of 35 inches. The handle is original.

039edit

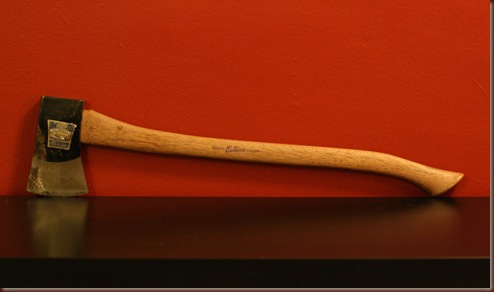
This is a boy’s axe. This particular one is a Collins Homestead Dayton pattern. It has a head of a little bit over 2lb and a handle of about 27 inches. The handle is the original one. Axes are still made under the Collins name, but the quality these days is very different from the axe you see in the video.

156

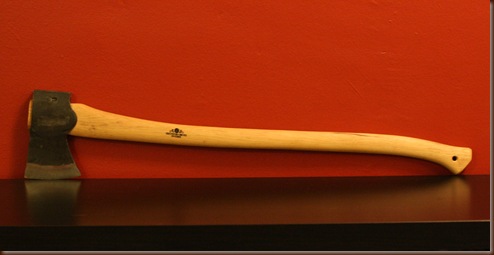
The 3/4 axe is a Gransfors Bruks Scandinavian Forest Axe. It has a head that weight 1.75lb and the handle is 25 inches long. These axes are currently in production and are made in Sweden.

174

The small axe is one that I put together. You can see more details about how I did it here. It has a 1.5lb head and a 20 inch handle.

180

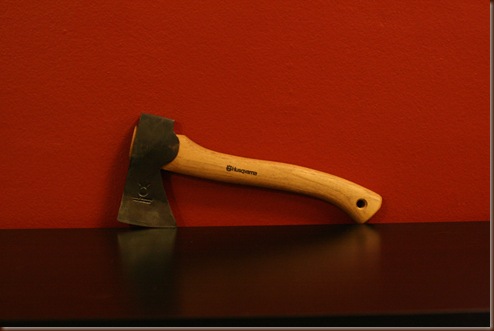
The hatches is made by Husqvarna. This particular model is no longer in production. The head weighs 1.25lb and the handle is a little under 12 inches long.

188

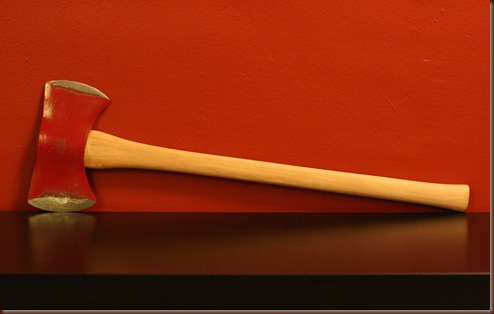
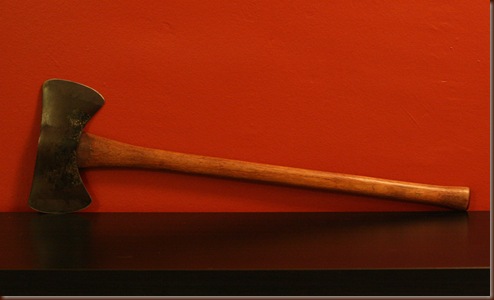
The Full size double bit axe is a True Temper Kelly Perfect Western Pattern axe. The head weighs 3.5lb and the handle is 35 inches long. The handle is original. Double bit axes came into use in North America around the 1850s.

101

The cruiser axe is a Barco Cruiser Axe. It has a head weight of 2.5lb and a handle of about 27 inches. These axes are currently in production.

106

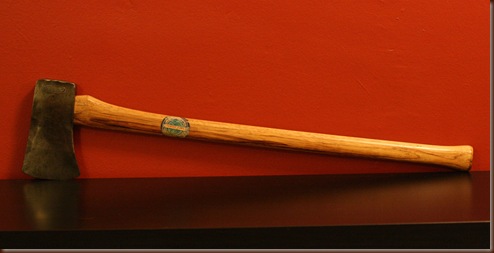
The straight handle axe is a Dunlap Michigan Pattern axe. It has a head weight of 4lb and a 36 inch handle. The handle is either original or an early replacement.

135

The modern axe without the convexed bevels is a Gransfors Bruks American Felling Axe. It has a head weight of 3.25lb and a 35 inch handle. They are currently in production.

153

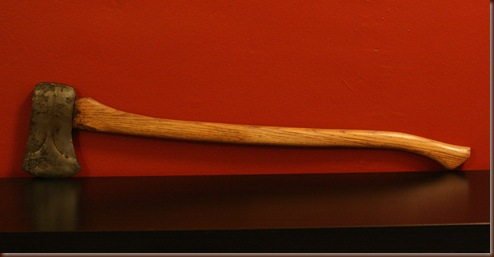
The Michigan pattern axe that you saw compared to the True Temper Dayton, is made by PowrKraft. The head weighs 3.5lb and the handle is 35 inches long. The handle is original.

142

The Rockaway pattern axe is made by Plumb. It has a head weight of 3.5lb and a 35 inch handle. The handle is original.

092p

As you saw, the phantom bevels were used by a number of manufacturers. Not all high end lines however had phantom bevels. Usually each manufacturer had several models without. Here is a double bit Michigan patter axe made by Plumb without phantom bevels. It was not shown in the video. It has a 3.5lb head and a 32 inch handle.

119

This is the last part of the series. I hope it has been of some use as an introduction to what you may find on the market today, both used and new.

Thursday, July 14, 2011

Peach and Raspberry Slice


Another Bill Granger recipe taken from his book, Bill Granger Every Day, there are so many great recipes you are spoilt for choice.

It's always good to cook with fruits that are in season, the raspberries were freshly picked from my garden, unfortunately the same can't be said about the peaches.

This is an unusual recipe and I kept my fingers crossed it would work out. Fortunately, it never let me down - the base is sticky with a cake layer on top. This is quite sweet and I would recommend cutting down on the sugar. The slice kept well in the fridge.

You will need: 20 x 30 cm greased and lined tin but a smaller tin will give you a thicker cake layer.

185g plain flour, 1½ teaspoons baking powder, plus ½ teaspoon extra, 125g chilled and cubed butter, 115g soft brown sugar, 115g caster sugar, 3 peeled and sliced peaches, 90g raspberries, 2 teaspoons natural vanilla extract, 1 lightly beaten egg, 185ml milk

1. Preheat the oven to 180°C. Grease and line the tin.
2. Sift the flour and baking powder into a large bowl and rub in the butter. Stir in both of the sugars. Press half the mixture over the base of the tin. Lay the peaches over the top and sprinkle over the raspberries.
3. Add the vanilla extract, the extra baking powder, egg and milk to the rest of the base mixture and stir well. Pour evenly over the top of the peaches and raspberries and bake for 1 hour. Cool in the tray, then cut into squares.

To peel peaches: score a cross in the skin with a sharp knife, then blanch the peaches in boiling water for 30 seconds, refresh in cold water and peel the skin away from the cross.

Some Pictures From Last Weekend

Last weekend I decided to take a break from shooting content for the blog, and just spent some time in the woods with my girlfriend and the dogs.

113

The little one came along as well.

090

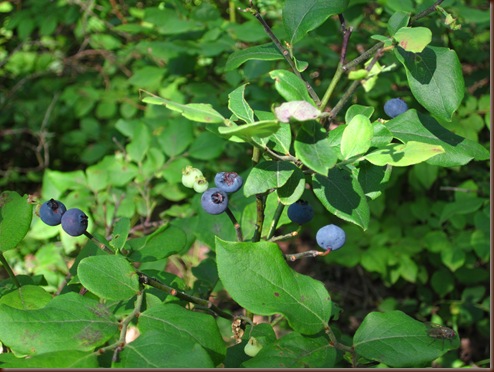
The blueberries are out in good numbers. In this area there are blueberry and huckleberry bushes as far as you can see.

070

The mushrooms also seemed to be out. I have no idea what they are, and I don’t even try to guess.

069

077

140

082

We climbed to the highest point in the area and called it a day.

130

We picked the opposite direction on the compass, and two hours later we were back at the car.

Once Magazine: Photojournalism For The Mobile Age?


As I'll be on my way to Buenos Aires this evening for the Foundry Photojournalism Workshop, I thought of posting this potential photojournalism opportunity about Once Magazine.

Once Magazine claims that it will publish three stories of about twenty-five full-screen photographs with captions, an introductory text essay, and interactive features. The magazine will allow photographers to tell their stories by using the iPad as one of the mobile platforms.

The magazine will split all subscription revenue directly with photographers, and its stories will be chosen for their "narrative appeal, journalistic insight, and photographic quality."

For further information and to submit stories and projects, take a look at the magazine's About page.

I wish Once Magazine's team success. I can't foretell its future but I'm sure many photographers/photojournalists ought to be rooting for it to succeed.

Wednesday, July 13, 2011

Review: Wahl James Martin Spice Grinder


The first thing you notice about the Wahl James Martin Spice Grinder is how sleek and well designed the grinder is, it has a useful pull down cord storage, which is then pushed back into the main body of the grinder.

This is an interesting spice grinder because unlike other grinders it has a unique attachment, which means you can grind small amounts of spices effectively. For larger quantities this can be carried out without the attachment.

I always dry roast and grind my spices when I make a recipe, this way more flavour is released than if you buy ground spices. All you have to do with this spice grinder is to let the roasted spices cool down before grinding. The grinder has a pulse on/off button which makes it possible to grind from coarse to fine.

The grinder is extremely efficient and only takes a couple or so pulses for a coarse grind and then a few more pulses for a fine grind. To grind coffee beans and peppercorns the pulse button can be used on continuous.

I made a Curry Mint Paste from 15 fresh mint leaves, 2 tsp coriander seeds, 2 tsp curry powder, 2 curry leaves, 1 tsp ground ginger, 1/2 tsp sea salt. I simply placed all of the ingredients into the grinder and gave a few pulses until a paste like consistency and then used to marinate the meat for the Mint Lamb Curry, which is also a recipe in the booklet to accompany the Spice Grinder.

A brief summary of the grinder:

Stainless Steel Blade
40g capacity
150W
Removable and easy clean grinding bowl
£24.99

Thank you Annabel.