Thursday, January 31, 2013

Special Occasion Gift Ideas - 2013

Prestat are purveyors of fine chocolates and truffles, and who can resist chocolates that have the royal seal of approval.  This iconic brand is sure to please.  The chocolate truffles are smooth and made from the finest chocolate.  They are presented in a beautiful heart shaped box that can be kept long after the chocolates are gone. A fabulous gift for Valentine's Day.

****************


Handmade - Toasted Kentish Cobnut Brittle, Toasted Kentish Cobnut Fudge, Coffee & Kentish Cobnut Fudge, Roasted Kentish Cobnut Plattinums Enrobed in Ecuador Dark Chocolate

Potash Farm - artisan, fine quality, exclusive products, made in St Mary's Platt, Kent.  The cobnut fudges melt in the mouth and the brittle is buttery and very delicious.  The chocolates are exquisite, a thick shell of very high quality chocolate surrounds the roasted kernel of the cobnut.

All the products make an ideal gift for Valentine's Day, Mothering Sunday, Easter or Christmas - for further gift idea inspiration please visit their online shop. Cobnuts are a type of hazelnut and are traditionally grown in Kent.

*********************


Tan Rosie - Cherry Valentine's Day fudge made with fabulous Morello cherries, white chocolate, cinnamon, nutmeg and a hint of rose water. Only available until Valentine's Day. Grenadian Rum & Raisin Fudge is nice and spicy. There are lots of other treats to buy at their online shop. Tan Rosie create Caribbean food products inspired by family recipes from Grenada and Carriacou - they are based in the West Midlands.


                                                    ***********************************


Chocolat Chocolat - Bouquet of Handmade Chocolate filled with their famous handmade sheet chocolate and made with the finest Belgian chocolate.  These French Style wavy sheets of chocolate are sprinkled with French Sea Salt, Turkish Hazelnuts, Freeze Dried Raspberries to all give the most exquisite flavour combinations.  These chocolates are a taste sensation.  A beautiful, special and unique gift for any occasion which can be purchased either online or from their shop in Cambridge.

Chocolat Chocolat have been voted Cambridge's favourite chocolate shop.  Pop into the shop to try samples, take a leisurely browse at all the beautiful chocolate or even book a chocolate making or tasting course.

Thank you for all the wonderful samples.

Javier Arcenillas | Winner of 1000 for 1 Photo Competition

Photo © Javier Arcenillas. All Rights Reserved

Javier Arcenillas has been nominated as the winner of 1000 for 1′s first International Photography Competition. The photography contest was completely India-centric, and asked for the best photographs that truly represented the spirit of India.

With his wonderful photograph of a young girl in a small village called Noapara near Kolkata, Javier will be the proud owner of a Canon 5D markIII or a Nikon D800; which was the top prize offered to the winner of this competition.

There are three honorable mentions that were in the running for the first prize. The photographs by Massimo Ferrero, Laurent Nicourt and Matteo Imbrianti will receive a free entry in 1000for1′s forthcoming photography contest.

I was very pleasantly surprised at the high quality level of the short listed submission, are featured on 1000 for 1's website. I urge you to click on the thumbnails, and admire the quality of the large sized photographs.

Javier Arcenillas is a freelance photographer, member of Gea Photowords. He is a psychologist at the Complutense University of Madrid. He was also featured on The Travel Photographer's blog here.

I certainly don't wish to double guess the judges's decision since Javier's photograph is lovely, but since I have to live to my opinionated reputation, I will readily admit I would have had enormous difficulty not to recognize Massimo Ferrero's photograph of the silhouetted  ghat bathers (below).

Photo © Massimo Ferrero. All Rights Reserved


The photography competition 1000 for 1 is the brainchild of Italian photographer Matteo Vegettiwho describes himself as a traveller, a photographer and a writer. He photographed in the Middle East, the Balkans, India, Turkey, Europe and the Far East.

Drop by Matteo's website, and you'll be amply rewarded with wonderful travel photographs such as this one of an elderly Chinese man wearing phenomenal eyeglasses (I'd buy a pair in a heartbeat!)....and many more.

Photo © Matteo Vegetti. All Rights Reserved.


Wednesday, January 30, 2013

Bushcraft – Sadly, the Next Logical Step

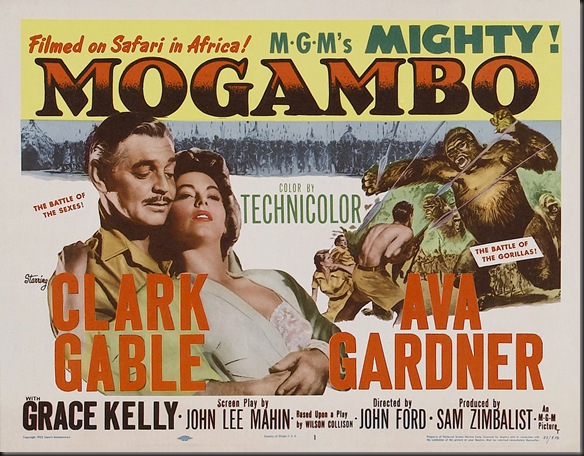
So, I was reading through Twitter yesterday, and came across a tweet by Ray Mears/Woodlore. It proudly read: “Ray found inspiration in Clark Gable’s ensemble in the 1953 safari film “Mogambo” for this new Woodlore product.” I thought it was probably some sort of marketing gimmick or joke, so I followed the link. To my great sadness, Ray Mears is indeed now selling “bushcraft” gear based on 1950s Hollywood’s interpretation of “the great white hunter”.

mogambo11

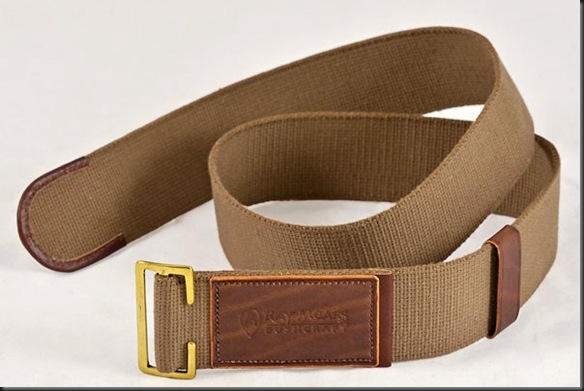
The “bushcraft” item being sold to us, for the bargain basement price of $118.00 (based on today’s exchange rate), is a belt designed after the one worn by Clark Gable in the movie Mogambo. If the price seems steep, don’t worry; it has Ray Mears’ name stamped on it, so it’s worth it!

Woodlore-Mogambo-Belt

As if completely oblivious of the absurdity of the product, the description on Ray’s website reads: “The Woodlore Mogambo Belt is a unique cotton canvas accessory hand-crafted by Woodlore's resident leather worker Becky Brewster. Trimmed with leather in the traditional Woodlore colour, the belt sports an embossed Ray Mears Bushcraft logo alongside a solid brass, military-style buckle. Ray Mears found inspiration for its design in the distinctive hunting gear worn by Clark Gable's character Victor Marswell, from the classic 1953 safari film Mogambo.”

For some time now you have seen me complain about how bushcraft has stopped having any connection to the outdoors. In some ways it has become just a sport in which we compete in our back yards. In other ways it has become a fashion show. We claim it is all about skills and living in the woods, yet we neither go into the woods, nor are willing to be seen without the latest bushcraft approved gear. I think this is the pinnacle, and logical conclusion to that trend. Why even bother trying to pretend that this is not all a big fashion show. We gather at these meetings, declare a champion in the “who can light a fire in the most absurd and impractical way” competition, and then we spend the rest of the meet eating bacon and showing off our latest retro (VERY IMPORTANT) gear. Few months from now, look for this latest “bushcraft” essential item. After all, it is all about using the resources nature provides…and a $118 belt that was worn by Clark Gable, brought to us by Ray Mears after many years of studying the traditions and native practices of the Hollywood Tribe of North America. Ah, selling out seems to be an essential part of being a woodsman these days. 

Jake Verzosa | Tattooed Women of Kalinga

Photo © Jake Verzosa. All Rights Reserved

The Province of Kalinga is a landlocked province of the Philippines in the region of Luzon, and due to
its mountainous terrain and its warrior-culture, its inhabitants, also known as Kalingas, were able to maintain their traditions despite the attempted occupation of the Spaniards, Japanese, and Americans.

Jake Verzosa photographed the last few tattooed women of Kalinga in an effort to preserve this vanishing art through his photographs. For the women of Kalinga, tattoos are not cosmetic, but symbolize women’s strength and fortitude. This traditional tattoo are indigenous body art, and are still practiced following the ancient methods.

According to Wikipedia, the word "tattoo" was brought to Europe by the explorer James Cook, returning in 1771 from his first voyage to Tahiti and New Zealand. In his narrative of the voyage, he refers to an operation called "tattaw" or "tatau". Tattooing has been practiced for centuries in many cultures, particularly in Asia, and spread throughout the world. Japan, Taiwan, Berbers of North Africa, the Hausa people of Northern Nigeria, and Māori of New Zealand have facial tattoos.

For interesting photographs and the back story of the last tattooed women of Kalinga, drop by Verzosa's About page.

Jake Verzosa is a freelance photographer based in Manila. As a fashion and commercial photographer, he has also expanded his craft and traveled extensively around Southeast Asia. He considers his documentaries and portraits as his personal work. His works have been exhibited in Manila, Tokyo, Singapore, Amsterdam and Paris.

Tuesday, January 29, 2013

Sawyer Squeeze Filter Field Cleaner Modification

I’ve been using the Sawyer Squeeze Filter now for close to a year, and I have been very happy with it. As you may remember, prior to making the switch to Sawyer, I used to use a MSR Miniworks EX filter. The reason why I was so hesitant to change over to a different filter was that the Miniworks had a ceramic filter element that was very easy to field clean. On the other hand, the only way to clean the Sawyer Squeeze Filter is to backflush it. For that, Sawyer provides a large ciringe. You fill it up with clean water, put it to the exit hole of the filter, and press. That pushes the water through, backflushing the filter. Of course, having to carry such a large ciringe in the field is not practical.

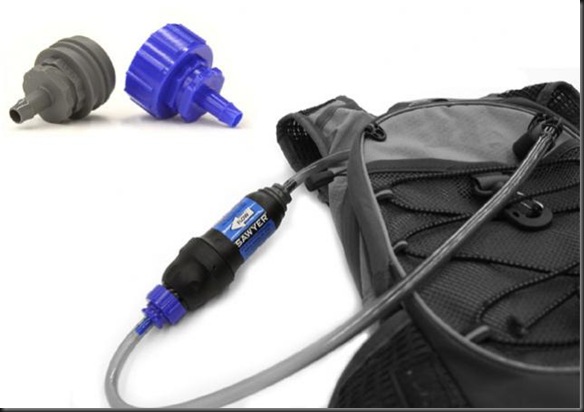
One I first got the filter, the first course of business was to figure out how to backflush the filter in the field (the reality is that I have not had to do it yet for purposes other than experimentation). I came up with a solution where I took a small piece of rubber tubing that would connect to the exit home of the filter, and connected the other end to a cap that would screw on a Platypus bladder. By squeezing the bladder, I would backflush the filter. You can see the modification here. The mechanism has worked well, but now there is a better option available. Sawyer has released a kit which allows you to splice the filter into the line of your hydration bladder. The kit consists of two parts that screw into either side of the filter.

e907e0c7-a70e-4699-919b-cc7cff5b5c4e

The line then connects to these adaptors.

sp110l_w640

Now, I don’t use a hydration bladder, so this wasn’t much use to me from that stand point, but I though it would be great for a backflush mechanism. It works in the exact same way as the old modification. I simply took a piece of rubber tubing and connected it to the blue part of the adaptor, the one that can screw onto a Platypus bottle.

133

For it to work, just screw the adaptor onto a collapsible bottle with clean water like a Platypus bladder. Take the other end of the tube and connect it to the exit opening of the Sawyer filter. Then squeeze the bottle to backflush the filter. The mechanism is exactly the same as the old adaptor, it is just much more durable and secure. This can also be used as a great way to fill up a Platypus bottle in the filed. Instead of backflusing, just connect the adaptor in the way described above,, put the regular bladder with dirty water on the filter, and start filtering. Because the Platypus bottle is connected to the filter with the adaptor, there will be no spilling of water.

The adaptor kit costs $5 and is available at REI.

Breville Elements Stainless Steel Jug Kettle - Review

Photograph courtesy of Breville
The new Breville Elements Kettle is blessed with stunning good looks and is both sleek and stylish.  Made from high quality stainless steel for strength and durability to stand the test of time. The kettle has a brushed and polished finish to give a sophisticated and timeless design.  This top quality kettle has a matching 4-slice toaster to complete the sleek yet modern look.

When switched on the water level window and on/off switch are illuminated.
The perfect pouring spout.

Upturned base showing the cord storage. 

The kettle has a built in filter which is removable and washable.
I'm busy planning a new kitchen at the moment and my cooker, hob, microwave and extractor will be in stainless, this fabulous kettle will compliment my kitchen perfectly.

Pros:
A premium kettle by a trusted brand.
Family size kettle with a capacity of 1.7L.
360º rotational base for left or right handed use.
There is a marked water level window.
The kettle can be filled with as little as 250ml water.
3kw concealed element.
Filter is removable and washable.
The base is non slip.
Kettle fits on and off the base easily.
You can get a good safe grip on the handle.
Extremely well made.
Quiet in use.
The perfect kettle.

A RRP of £79.99 available exclusively from John Lewis stores or www.johnlewis.com

Leandro Viana | Bolivianos

Photo © Leandro Viana. All Rights Reserved
It's not often that I feature work of South America, but these portraits of Bolivians by Leandro Viana should go some way to redress this omission.

Leandro photographed Bolivian people, musicians, dancers, families on the 8th of August 2010 on the occasion of the Bolivian Day of Independence using 10 rolls of Tri-X and a Rolleiflex. These are economic migrants seeking better opportunities and the hopes of a new life in the city of São Paulo.
Thousands of Bolivians arrive in that city on a daily basis, and many are forced to accept any kind of work.

However, when wearing their national dress on the occasion of the Day of Independence, their pride transcends the difficulties they may face in their daily lives.

Leandro Viana is a Brazilian photographer currently living in New York City. He graduated from  School of Sociology and Politics of São Paulo, and started his research and photographic documentation of Latin American immigrants in São Paulo.

This project is included in the Chobi Mela VII Photography Festival in Bangladesh.

Monday, January 28, 2013

Travis Jensen | 96 Hours In NYC

Photo © Travis Jensen. All Rights Reserved

I haven't yet done much street photography in New York City with my iPhone, spending whatever time I have roaming some of its streets instead with the M9 or the X Pro-1, but it's a tool I intend to eventually use, and use as well and as comfortably as I use my cameras.

So I was very glad to have found Travis Jensen's A New York Minute: 96 Hours in the Big Apple, a collection of candid street scenes and street portraiture made in Manhattan, Brooklyn, and Queens. The photographs were shot with an iPhone, using the Hipstamatic application’s John S. Lens and Blackeys Supergrain Film combo. No other effects were applied. The collection was featured on the Hipstamatic's iPad magazine Snap.

Travis Jensen's website has a number of lovely photo essays apart from the one of NYC, including a number of street photographs made in his adopted city of San Francisco.

He started his career as a writer for the San Francisco Chronicle, and taught himself teach photography.  His photographs were primarily made through the lens of his iPhone, but he didn't really take up smartphone photography until he discovered Hipstamatic, the popular iPhone app....which I much prefer to its main competitor Instagram.

He adopted the John S lens and BlacKeys Supergrain film, and (I didn't know that)  this combo has been widely adopted by the Hipstamatic community for street photography.

You may want to view this 5 minutes video which features Travis in his element...photographing in the streets of San Francisco.

Saturday, January 26, 2013

Nigel Slater Recipe: A Creamy, Crunchy Fruit Sundae


The wild blackberries are from a stash in my freezer.  A relative picked these last year at a top secret location in Melton Mowbray - I now live in the West Midlands, and I'm not likely any time soon to pass this intelligence to any Meltonians.

Nigel Slater's Simple Suppers was must watch TV and the recipe from his programme can be found on the BBC Food website.

This is an easy, yet delicious dessert recipe and all you have to do is gather the six ingredients together, whisk the cream and layer the ingredients.  I slightly adapted the recipe and used half double cream and half natural yogurt which I mixed together. The base layer is a scoop of vanilla ice cream, followed by a cream, meringue and blackberry layer, a few chopped pistachio nuts are sprinkled over for decoration.

A perfect sundae and I am entering this into Dish of the Month - January 2013. Hosts are Janice at Farmers Girl and Sue at A Little Bit of Heaven on a Plate.


POV: The Travel Photographer's Business Philosophy


I've been asked a number of times to share as to how it is that my Photo Expeditions-Workshops are consistently sold-out within a few weeks of being announced.

There are a number of reasons for that...some are no-brainers and others are more complex...these take dedication, research and commitment. But let's start at the top:

1. It's About The Brand.

There's the optics such as the brand name and trademark. I chose to become known as The Travel Photographer which is easily remembered, and perfectly describes what I do, leaves no room for confusion and is anyway easier to pronounce (at least for Americans) than my own name.

"Everything I do with my photography carries The Travel Photographer brand."


I've been using The Travel Photographer brand name, and its accompanying logo (simple, sober and solid) for about 8 years, so it's been in the public domain and has widely been around. It's not at all unusual for me to be accosted by other photographers who ask me "aren't you The Travel Photographer?"....and that's good....very good.

Everything I do with my photography carries The Travel Photographer brand...everything. The websites, the blogs, the galleries, and the photo expeditions-workshops...and of course, my newsletters.

I was perhaps the first who described what was originally peddled as 'photo tours' or 'photo trips' as 'photo-expeditions'. Semantics for certain, but it strengthens the branding impact of one's business.

Over and above the logo style, which as I described as sober, solid, and simple...like the logo for a well-established newspaper or bank for instance, the color schemes of my websites and blog also follow the same style. I believe it's not only my photographs and my style that defines me, but also the 'packaging'... there's a sort of consistency there, but without letting things go stale. Stylistic change is good, provided it's intelligent change.

2. It's About The Time.

I've been leading photo expeditions-workshops for more or less 10 years...and really worked at getting off the ground. As I wrote much earlier on this blog, it took off without me asking for favors, for free advertising, for referrals...I never did any of that. What I have accomplished is completely self-made and self-started.

I see many very experienced photographers suddenly getting involved in offering photo workshops, but  having difficulty in filling them up, despite their excellent body of work. It won't work without expensing the time, and effort to get a track record in leading such expeditions and/or workshops.

"What I have accomplished is completely self-made and self-started."


Yes, one has to use all the different types of social media...be it Twitter or Facebook, etc to spread the brand's visibility. However, I don't think I got a single participation from either of these two. Twitter and Facebook generate friends, a fan club or followers...but not necessarily clients.

The single-most source of participants for my photo expeditions and workshops is my blog, which is in its 5th year. Day in and day out...I post, keeping a tangible and intangible link with my current and future participants.  I've posted just over 3000 posts and reached the enviable (for a specialized photo blog like The Travel Photographer) number of 2 million readers since it started. That took time, effort, dedication and resolve.

From this blog, photographers subscribed to my newsletter, and are therefore keen to get details of my future photo expeditions-workshops. These are not followers, nor fans, nor friends asked to "like" my Facebook page, or Twitteratis. No, there are, for the most part, just interested in joining me on a photo expedition-workshop.

When I announce a photo expedition-workshop, I am mindful to keep a few 'seats' for past participants, aiming to have a 50/50 mix between past participants (I call them recidivists) and new participants. This ensures that about 50% of my groups are already familiar with my style of leadership, what to expect and what not to expect on the trip. It also gives confidence to the new participants that the group include people who've been on one or more trip before.


3. It's About The Research And The Niche.

I set up photo expeditions-workshops where I would want to go had I been a participant. I set up photo expeditions-workshops that aim at documenting an event -or series of events- that I am interested in. My forthcoming The Sufi Saints of Rajasthan & Ajmer Photo Expedition-Workshop is a case in point. At its core is the Ajmer Sufi celebrations which, in contrast to the over hyped Kumbh Melas, are unique authentic religious events, never offered to photographers through a photo trip. As I am personally interested in documenting Sufi culture in South Asia and elsewhere, this type of photo expedition-workshop is one of my trademarks.

My intellectual interest in religious and cultural events in South Asia and South East Asia is my niche, and it puts me in a different light from other photographers.

I research my destinations very carefully beforehand, and absorb whatever I can on the prevailing political climate affecting where I'm about to head off to. This is not a one-time thing...but a continuing exercise. I keep track of the news for India via Indian newspapers, as well as news of Cambodia, Vietnam, Indonesia, Malaysia, etc. This is an invaluable necessity that I must spend time on. I do not claim expertise, but I keep myself abreast of important local developments that may affect my decisions.

"...but I really want to photograph at other more interesting venues."


Generally-speaking, I now infrequently lead 'touring" photo-expeditions-workshops. Going from one destination to another with no specific religious or cultural event(s) on the itinerary may be photographically productive, but I find it intellectually-wanting.

I also avoid the popular religious/cultural events; the Kumbh Mela and Pushkar Fair are two examples. It would not be hard at all to fill photo expeditions for these two specific venues in no time at all, but I really have no intellectual interest to attend either of those. I've done them, and enjoyed them...but I really want to photograph at other more interesting venues.

4.  It's (Also) About The Bottom Line.

I don't use middlemen in the United States to set on-the-ground facilities for the itineraries I research and decide on. It might be the easy way, but it's also the most expensive. I  employ a handful of travel agents (or hotels operators) in India, Vietnam, Cambodia, Indonesia and elsewhere that I trust and can rely on...and  with whom I've dealt for a long time. I try to get the best possible deals for the participants in my photo expeditions-workshops, as I would if I was on my own. I  have a fiduciary responsibility towards my groups, and I take it very seriously.


Friday, January 25, 2013

Essential Wilderness Survival Gear and Skills for Imaginary Survival Situations

So… this is going to be another rant. If they annoy you, please ignore it. If you decide to stick around, I’ll gripe about how most of the information we see today on survival is designed for situations that only exist on TV and books.

450px-Fallout_Protection_For_Homes_With_Basements-Illustration_20

I’m sure I’m not the only one who has noticed this phenomenon. You open a blog, and you see a post about “How to build an emergency survival shelter”. Sounds like a great skill to have, so you keep reading. “All you’ll need for the shelter is an axe, a buck saw, 50 feet of rope, and four to six hours”. What?! In what contrived, staged survival scenario did you just find yourself, where you are stranded in the woods without your gear, but you have an axe, saw and 50 feet of rope, let alone the luxury of four to six hours? First, if we look at this realistically, why are you in the woods without proper gear? Second, why are you in the woods without proper gear, but are for some bizarre reason carrying several pounds of cutting tools and rope? Third, if the answer to the above two questions is that you lost your gear in the woods, then what miracle of nature allowed you to lose all your other gear, but let you keep the exact tools you will need for the shelter?

And let me be clear that I am not trying to pick on bloggers. After all I am one. Of course we do things that are sometimes wrong with the knowledge and resources we have. Here I am talking about respected bushcraft and survival experts and instructors.

Last night I was re-watching an episode of Ray Mears’ Extreme Survival; the one on Arctic Survival. When I first watched it about fifteen years ago, I thought it was brilliant. In many ways it still is. Something struck me as odd however. The episode starts with him showing us how to survive a night in a northern forest. He gets off his snowmobile (presumably a survival situation where his snowmobile broke down), and starts making shelter and fire. He takes out an axe, a knife, a snow shovel, an old sleeping bag, a cup, a fire steel, and then proceeds to make a shelter that will let him survive the night. Which aspect of this survival scenario is realistic, and which of the skills that are then demonstrated is in any way practical for a real survival situation? The same questions as above apply here. How did you end up in a survival situation deep in the woods with an “old” sleeping bag rather than your properly rated sleeping bag, which would let you spend the night out without relying on a fire? How did you end up without shelter, stove, proper sleeping gear, but at the same time end up with an axe, knife, snow shovel, etc?

Similarly, in the episode on survival in the Rocky Mountains, he proceeds to build an emergency lean-to together with a long fire. All he needed was an axe and his knife… and matches to start the fire. Under what conditions did you go hiking in the woods without proper gear, but with a 3/4 axe? What happened to the contents of the backpack to which this axe is strapped? Which part of building an “emergency survival shelter” with an axe is useful to someone who is in a realistic survival situation? Presumably in a real survival situation the person has lost their whole pack, not just the select pieces that would require them to build a shelter, but not the ones needed for its construction. Also presumably a person in a real survival situation did not stage it as such, so there is no reason why they would be in the middle of the forest with just an axe.

Let’s move on to another well known survival and bushcraft instructor, Mors Kochanski. Recently he has started to release videos on YouTube. One of them, which I linked to here in a prior post, was on building a survival kit. While his recommendations were all very good, he ended up with a survival kit that weighs several pounds and required a backpack to carry. Nothing wrong with it in and of itself, but under what imaginary conditions are you in any way likely to end up without your regular (presumably sufficient for the climate) gear, but you will still have this huge survival kit? Since the kit is so large, the only logical, or even possible place to carry it is your backpack. If you have lost your gear, presumably you have done it by losing your pack. In that case the survival kit is gone as well.

Similarly, in his videos on selection of survival axes, he recommends an axe that has a 27 inch handle and weighs 3.5 lb. Other than in a class or on YouTube, how can you realistically end up in a survival situation where you have no gear, but as if to shoot an instructional video, a 3.5 lb axe appears to save the day? After all, he himself states that whenever his canoe flips over, the axe is usually the piece of gear that gets lost first.

And in case I have not torn down all of your heroes, have you seen the required items for the Dave Canterbury’s Wilderness Outfitters Survival Course? Let’s start with the bag of steel wool. Looks like you will learn to light survival fires with steel wool and batteries. After all, I know that when I find myself stranded in the woods and have lost my lighter and matches, I always have a bag of steel wool and a pack of nine volt batteries handy. I’m being sarcastic of course. How would you possible end up in the woods with steel wool and batteries, but not proper fire lighting equipment? It’s absurd, and only occurs in staged survival situations where party tricks like these are presented for entertainment. The next required item… a queen or two twin size wool blankets. They will actually teach you how to survive with two wool blankets. Again, how is it possible that you would end up in the woods without proper shelter and sleep gear, but carrying two wool blankets?! What, did you get your packs confused and brought your backpack full of blankets instead of the one with you backpacking gear? It’s right down absurd and 100% unrealistic.

The wool blanket survival issue is not unique to Dave Canterbury either. Similar examples can be seen all over. How about posts about surviving a night in the woods with just a blanket? If you are carrying 3 lb worth of blanket into the woods, why on Earth are you not carrying a 3lb sleeping bag so that it wouldn’t be a survival situation to begin with? Why would you have a blanket with you but not a sleeping bag, or for that matter, your regular gear? This is a contrived survival situation that has been created on purpose. There is nothing wrong with testing yourself if you so wish, but this does not translate into a genuine survival situation, nor are the skills subsequently demonstrated directly relevant to a real survival scenario.  

All of the above examples present situations where interesting survival skills and gear can be presented, but it bothers me that none of them have any connection to the reality of a likely survival scenario. They are created for television or books, and allow us to daydream about surviving in the woods when we are stranded there with no gear except for an axe, a knife, etc.

I’ve noticed similar things with my own gear selection. For a long time I carried tools for making cups and water storage devices, just in case I lost my pot, bottle, and cup. Where did I keep the carving tool? You guessed it, in my pack with my pot, cup and bottle. Eventually it struck me that if I somehow lost all that gear, the tool I kept for that survival situation would be lost as well. Now, I could go in the woods with just that carving tool and shoot a video on how to make a “survival” container, but I would not be showing you anything related to real survival because in a real survival situation I would have lost that tool along with the rest of my gear.

The only practical aspect of the survival skills and gear that I have been discussing above are to demonstrate how to use good woods skills to make up for the fact that you are a horrible woodsman. After all, one of the most important things about being a good woodsman is knowing the proper gear to bring for the weather and conditions you are likely to encounter. If you find yourself stranded in the woods with just an axe and 50 feet of rope, you have made some horrible decisions that should be revisited and corrected way before you have to start worrying about how to build a shelter with an axe. The first step to correcting those errors is to stop watching survival tutorials so you don’t get the idea of going in the woods with an axe and a bag of steel wool, instead of proper gear.

Don’t get me wrong, I have nothing against staged survival scenarios as a teaching tool. What bothers me is that so much of those staged survival scenarios are not staged to show any realistic survival or skills. They are staged to make the host or writer look good and make the activity look exciting and fun, but as a result, they deviate significantly from the skills needed in a real survival situation or the tools you may be likely to have. Of course, there are others like Les Stroud who strive for realism. However the reality of his survival is not nearly as dramatic, spectacular or inspirational.

Nicole Tung | Old Kashgar

Photo © Nicole Tung-All Rights Reserved

Beijing has been pouring billions of dollars into Kashgar, which was designated as a special economic zone back in 2010, and one of only half a dozen such zones in China, with the intent of transforming it into the transport hub of old - opening up markets in Central Asia and beyond. In the process, many of its historic buildings were demolished....and an old way of life is fast disappearing, raising the anger and discomfort of local the Uighur community.

I thought of featuring Nicole Tung's Old Kashgar Renewed photo essay, which is about 3 years old, which perfectly captures the spirit and ambiance of Kashgar. I haven't come across any recent photographs of the impact of Kashgar's "Sinification".

Kashgar is a important hub on the Old Silk Road, a vibrant Islamic centre within Chinese territory, where over a thousand years ago, traders from all over Asia, sold and bought their goods on its streets. It is the largest oasis city in Chinese Central Asia and 90% of its population are Uygur.

Nicole Tung graduated from NYU after studying journalism and history, and freelances for The New York Times and other international newspapers. Her work has been recognized by the International Photography Awards, the Maybach Foundation, the Hearst Foundation, and the NYPPA. She won the PX3 silver award (war reportage professional category) for her work in Libya in 2012. She was also widely exhibited in various international venues.

A recent interview with Ms Tung on her work from Syria was published here.

Thursday, January 24, 2013

Yo! Sushi, Poland Street, London - Review


Salmon Sashimi from the conveyor belt.
Posting courtesy of Kitchen Delights London based reporter.

On your last visit to Yo! Sushi the chances are that you ate a few sushi dishes straight from the conveyor belt. After all, it’s quick, convenient and what they are famous for.

However last week, I was kindly invited to try some of the new Ramen dishes Yo! Sushi have just launched. For the uninitiated, Ramen is a common Japanese noodle dish, which can contain anything from chicken to beef to pork, vegetables or fish cakes all served in a warming broth – the perfect comfort food!

Five Spice Gyu Ramen
Outside it was extremely cold and snowing, I was feeling braver than usual and ordered the Five Spice Guy Ramen. Delightfully tender British beef marinated in five spice, garlic, ginger and sesame oil – it actually wasn’t too hot and rather tasty.  It was the perfect follow up to a couple of sushi plates from the conveyor belt.

Kaisen Ramen
My dining partner was also content having opted for Kaisen Ramen - handmade fish cakes served in a hot broth with ramen noodles. We also had a choice of dips and oils to add to our dish, such as garlic puree and hot chilli oil which was fun – but do be careful not to put too much into your bowl as they are on the strong side!!


The Ramen dishes are priced between £7-8 pounds.

Thanks a mill to the hospitable Gabriella at Yo! Sushi, Poland Street, London.

POV: Creation Of A Tintype Photograph


Readers of this blog know of my current flirtation with the wet plate look, so I'm glad to have found this short movie describing the rather finicky process of creating a tintype photograph. Bob Shimmin is the photographer describing this process, and he makes it look simple...and it isn't. It's slow and deliberate, part science, part alchemy and art. He has been working in the little used photographic process of wet plate collodion for a number of years.

This video is part of the Kalamazoo Valley Museum special exhibit - Remember Me: Civil War Portraits. You can also watch how Shimmin got involved in tintype photography on this documentary.

I learned from scouring the web that tintypes were introduced in 1856 as an alternative to the daguerreotype and the albumen print, the tintype was widely marketed from the 1860s through the first decades of the twentieth century as the cheapest and most popular photographic medium. It differs from the wet plate because the light sensitive material is coated onto a piece of iron rather than glass...but the process is similar.

I've also found Penumbra Foundation Center, which is a New York City organization dedicated to preserving historical and emulsion based photography, and which offers tintype (and other alternative processes) workshops.

Of course, if that is too cumbersome or complex, there's always the Hipstamatic Tinto 1884 App or the Alt Photo App for the iPhone! My gallery of portraits made using desktop version of the latter app is The Digital Wet Plates.

Wednesday, January 23, 2013

Crock-Pot New Design Slow Cooker: Review

                                                          Photograph courtesy of Crock-Pot
                                                       
My red Crock-Pot slow cooker not only looks fabulous but is the perfect way to make and serve a Valentine's Day meal for a loved one. Red is one of the hot colours for kitchen kit and brights add a welcome splash of colour. A meal can be cooked in one pot and after a few hours you have a delicious meal. Starters, mains or dessert can be cooked without too much fuss.

Slow Cooker Steamed Chocolate Pudding
Well greased basins, base lined with a circle of baking paper - chocolate batter made....


Basins securely covered with a square of pleated non-stick foil (this makes life easier). Pour boiling water into the pot to come half way up the basins.  Place the lid on top, and cook at high heat setting for approximately 2 hours, check the water level after an hour.
Puddings are well risen and ready for turning out.
The slow cooker is supplied with three very useful serving utensils.
Pros:
The slow cooker has two heat settings high and low.
There is a keep warm function.
3.5 Litre capacity which is ample for 2-3 people.
Large side handles make it very easy to lift.
The removable stoneware cooking pot and lid are dishwasher safe.
The stoneware cooking pot is oven safe.
Stylish slow cooker and eye catching design.
Other colours available.

Cons:
The glass lid cannot be used in the oven.
The lid is loose fitting.
The Owner's Guide includes only a few recipes.

However, there are some fabulous slow cooker recipes to choose from on the Crock-Pot website.

The Crock-Pot has a RRP £34.99 and is available to buy from all good retailers.

Thank you Crock-Pot for my fabulous slow cooker.

Trip Report: 1/19/13 – 1/20/13

I had some free time this past weekend, so I decided to plan out a trip into the woods. My goal for the weekend was to pick out a route that would be challenging, and would allow me to use a wide range of gear and techniques. I selected a piece of terrain that I thought would let me do that.
12148

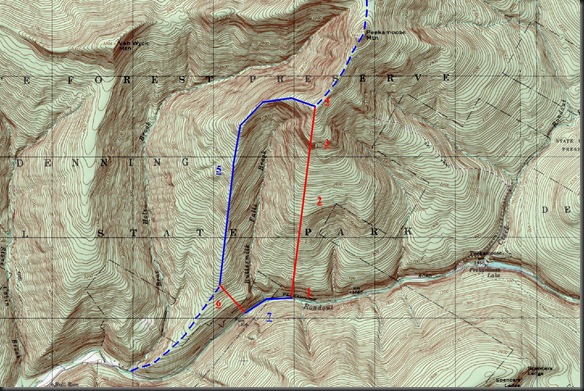
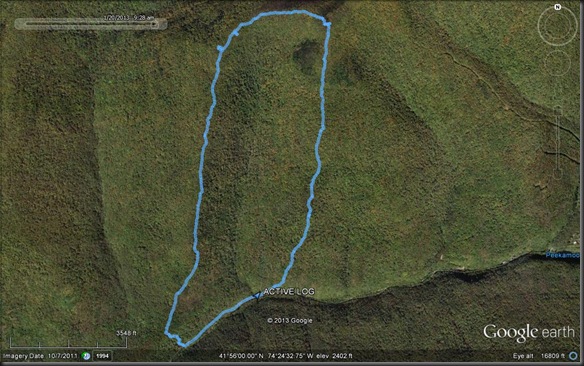
I would start out at the road, at an elevation of about 1200 ft. From there I would take a bearing to a mountain in the distance. It would not be visible from the road, so I would have to navigate based on the bearing taken from the map, and bushwhack from my location to the top of the mountain. The route is marked by a long red line on the picture above. This approach would present a number of different challenges, which would require me to use different techniques and tools. For example, the sections marked as “1” and “3” are very steep with the contour lines of the map almost next to each other. This would require some crampon use and travel over steep terrain. On the other hand, the section marked as “2” is more gradual, allowing for some snowshoeing. The plan was that once I reached the top of the mountain at about 3500 ft, “4”, I would connect with a trail that passed through the area and follow it down “5”, and leave it at the very end for some more bushwhacking “6” until I make it back to the road “7”.

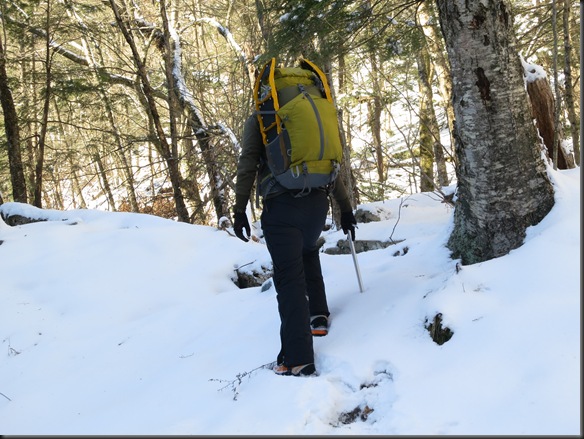
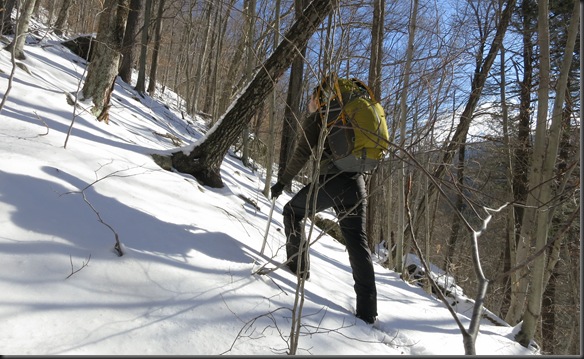
So, I started out in the morning. The whether was good, about 25F (-4C). As expected the initial section was steep, although, I was able to find good approaches all the way up.
045

060

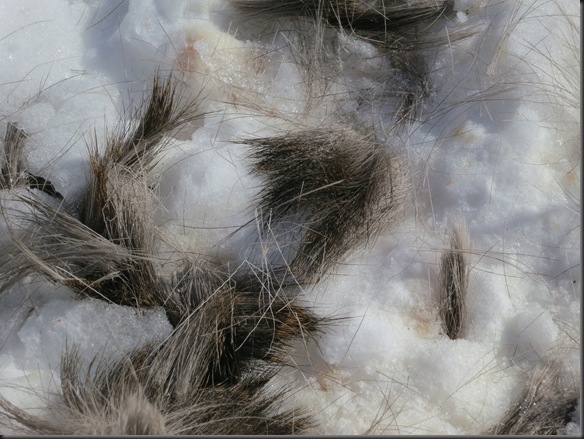
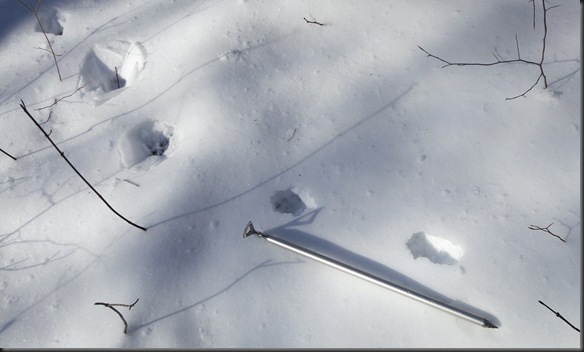
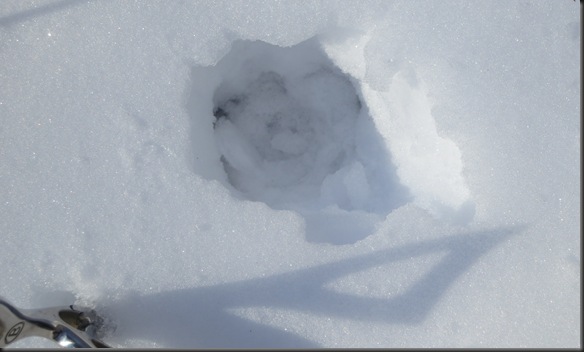
The snow was frozen hard, and a number of animal tracks were preserved. One particular kind seemed to zigzag perpendicular to my direction of travel. I took some pictures. I would see these tracks crossing my path almost all the way up to the summit.
076

079

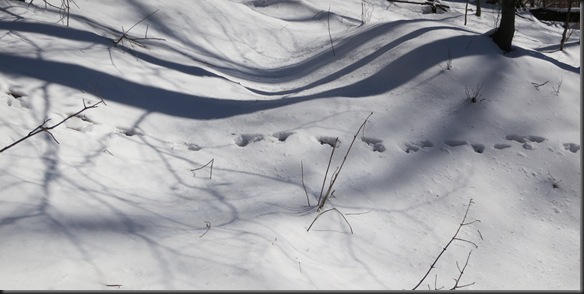
After some climbing, the ground started to level out. The snow was still hard, so I didn’t need my snowshoes. I spotted another set of tracks. To my inexperienced eye they seemed like deer tracks. They were headed up the mountain, so I followed them.
091

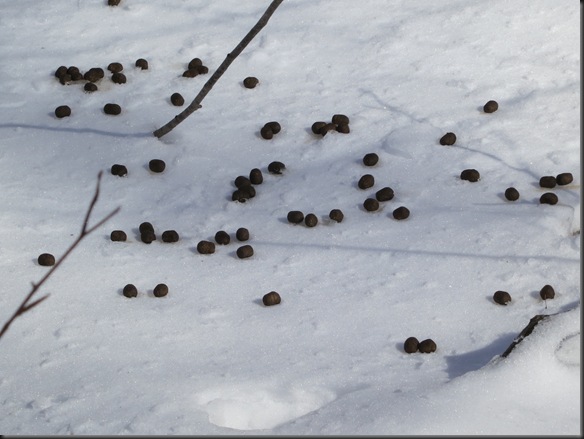
I eventually spotted some scat, which looked like deer to me, but more spread out than I am used to seeing it.
086

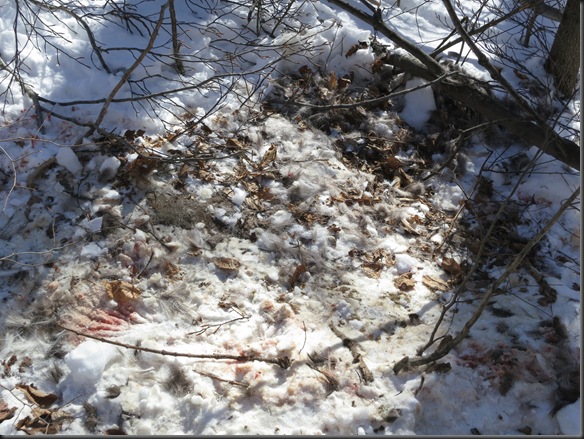
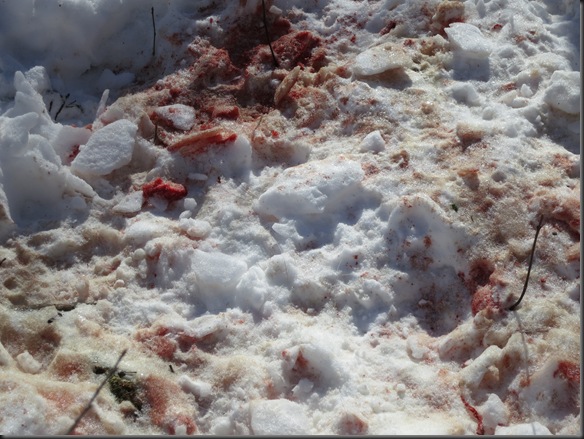
Some distance above that location I spotted, or more exactly smelled, what I guessed was a deer wallow. Edit: General consensus seems to be that this is a site where coyote killed or at least attacked and wounded a deer.

113

There was a fair amount of blood at the location. I am not familiar enough with this stuff to be able to say whether this is normal or not.
141

124

119

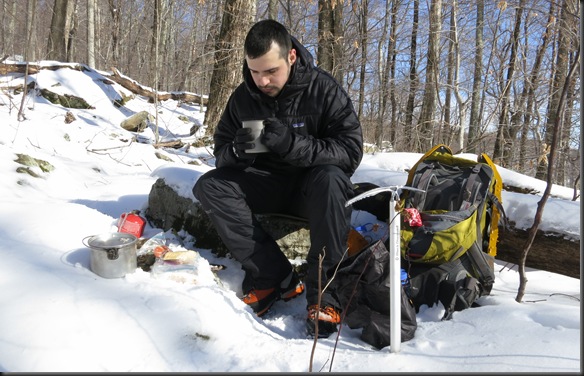
The smell was strong, so I got out of there quickly. I kept moving for another hour or so, at which point I decided to stop and eat lunch. I used the Kovea Spider stove to heat up some water. The stove worked great despite the cold and the fact that the canister was almost empty.
173

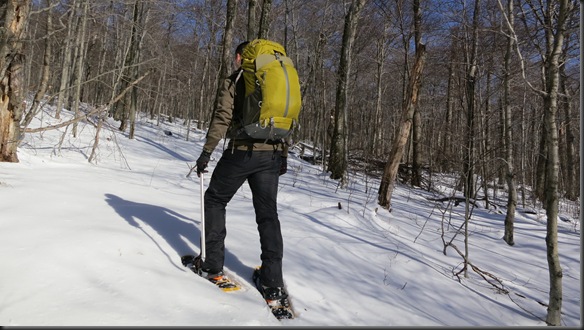
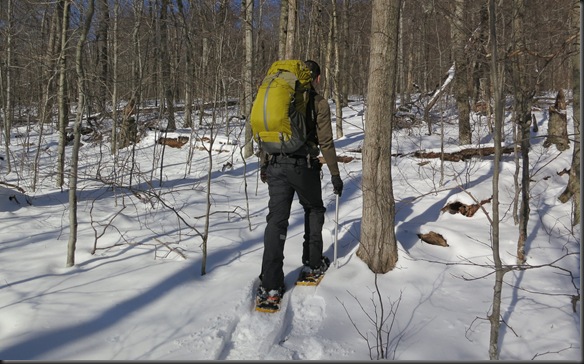
After lunch the temperature had started to climb, and the snow was getting softer. I pulled out the snowshoes. These snowshoes are new, so I wasn’t sure how they would work with the shoes I was wearing, but they performed great. The snowshoes I was using are the 25 inch MSR Lightning Ascent. MSR’s Ascent series is their most aggressive snowshoe, designed for backwoods use. They have large crampons built into the frame and the toe area. They allow for travel over steep and uneven terrain. I was surprised how well they performed. They were light years ahead when compared the the Army surplus snowshoes that I had used in the past. I was very pleasantly surprised.
186

198

Eventually I reached the second steep section of the trek. This time there was no particularly easy approach. I headed up, and at times I was rather scared. After some climbing, I started to see above the trees below.
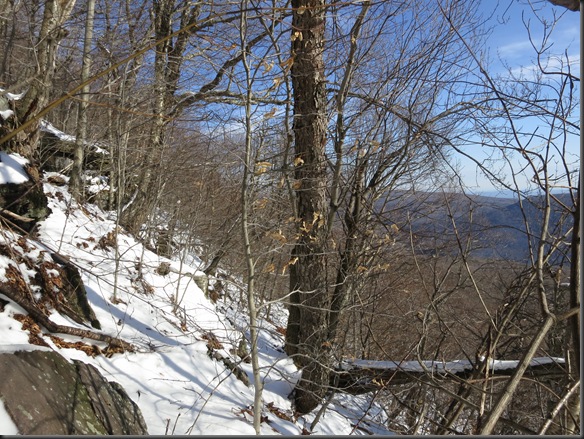
234

Eventually, further up, I was able to find a good approach to the summit through the rocks. At this elevation the wind was very strong. It made the sweat freeze on me immediately. It was a strange combination of being hot and cold at the same time.
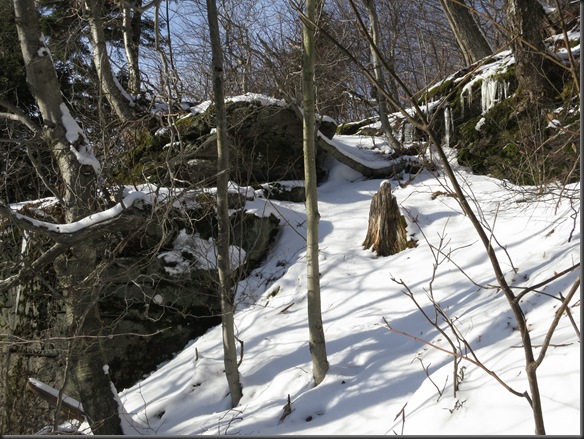
250

After a final push, I reached the top of the mountain. A few steps away I spotted one of the trail markers. The hard part was done.
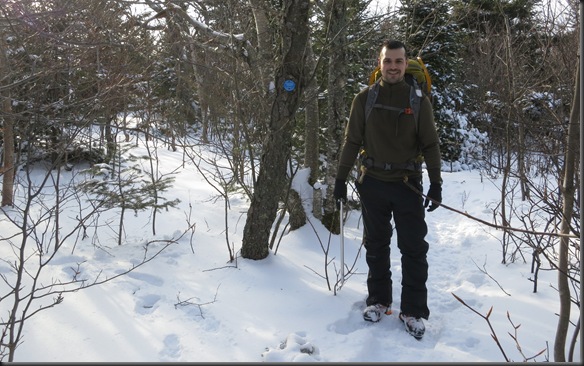
262

Not far from this location, there was a good shot off the peak.
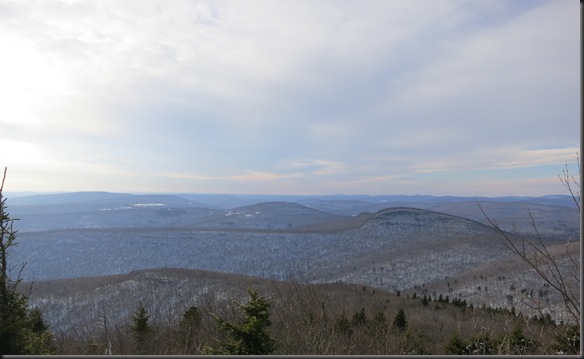
283

It was now around 4 pm. With sunset at 5 pm, I had to hurry down the trail, so I could get to a lower, and less windy elevation where I could set up camp. I found a good spot some distance from the trail. I cleared out the location with my Bahco Laplander saw, as I had not brought my hatchet on this trip, and stamped out a platform.
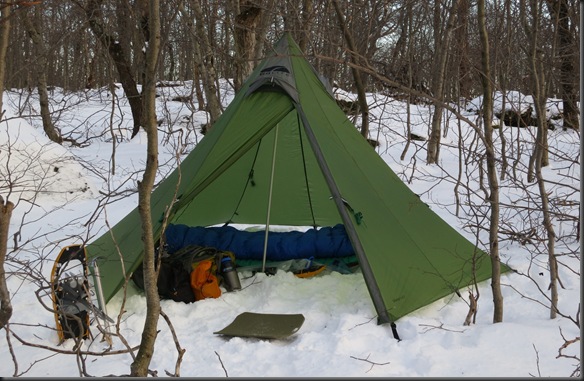
295

I used MSR snow stakes to for the tent. They are a great piece of equipment. They hold well without much effort.
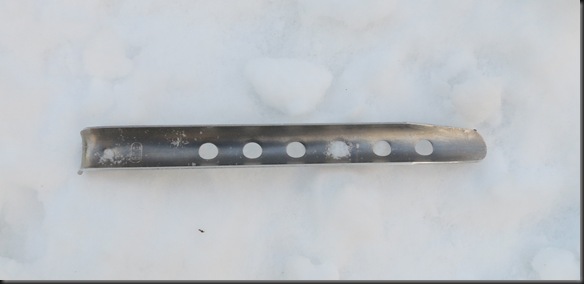
350

If you are wondering where the second snowshoe is, it is being used as a support for the center pole.
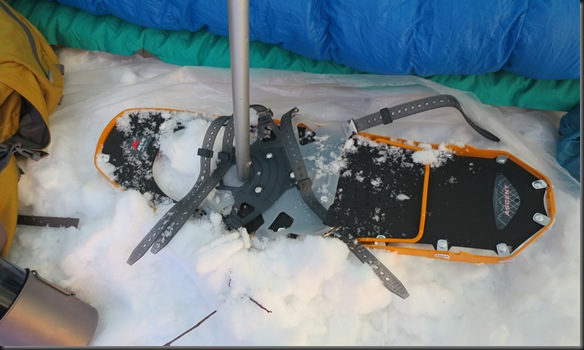
309

I sat, cooked dinner, and melted some snow so I can stock up on water for the next day. I kept my water bottle in the sleeping bag during the night.
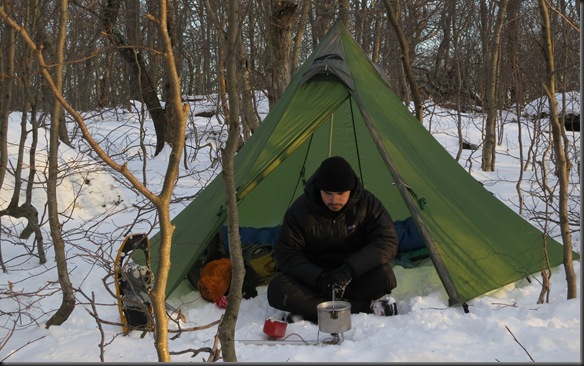
301

Now, in case you didn’t know, here is a trick for using a stove in the snow. Obviously, if you just place it on the snow, the stove will heat up and melt down through it. The best thing to do is place it on a rock, but that is not always an option. Something you can do instead is use your ice axe as support.
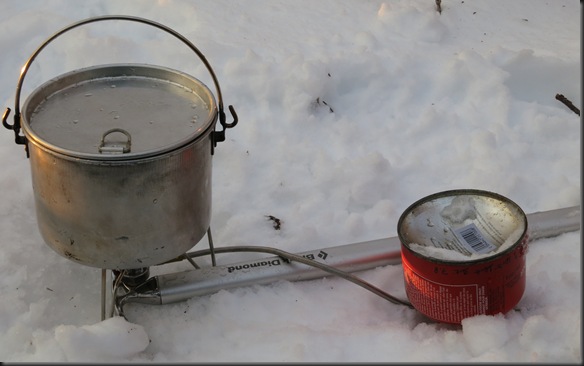
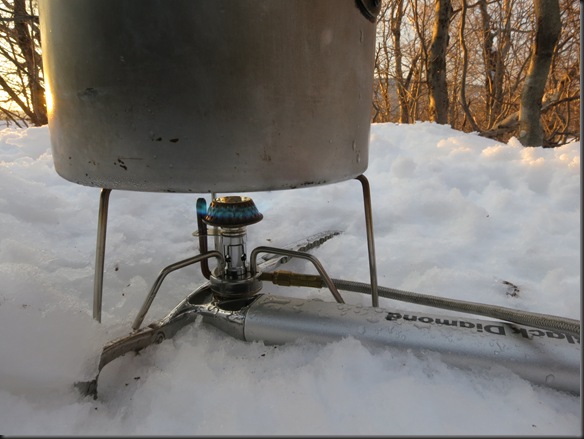
328

325

All that was left to do at that point was eat dinner and watch the sunset.
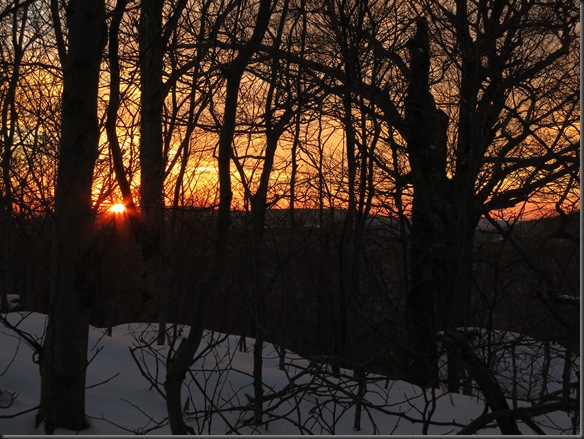
341

Soon after sunset I went to sleep. The best part of winter camping is that you get to catch up on sleep. The night was uneventful. The next morning I packed up and got going down the trail, or more precisely next to the trail. The trail itself had turned into ice. I found the snow next to it easier to travel.

I had decided not to wear my shell pants for the descent. I wasn’t going to be doing any serious climbing, and it didn’t matter too much if some part of my pants got wet. The gaiters would be sufficient.
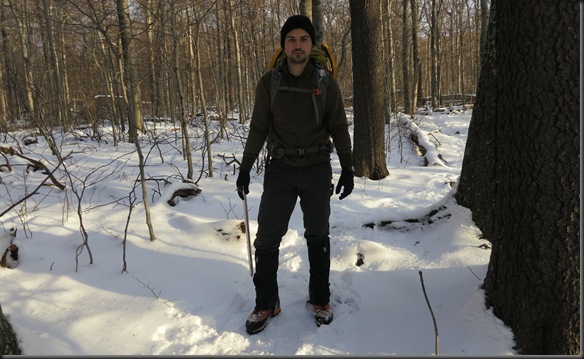
352

I made good time down the trail, and soon, cut back into the woods towards my final location. When I scaled down a steep section of rock and saw a waterfall, I knew I was close.

361

Shortly after I was back at the car. Most of the gear performed well. I was very happy with the Scrapa Mont Blanc boots, the Black Diamond Sabertooth crampons, the REI Flash 62 backpack, the MSR Lightning Ascent snowshoes, the Kovea Spider stove etc. The only problems I had were with the vapor barrier liners (VBL) and the gaiter. The VBL kept sliding down into my boots which was annoying. The gaiters kept accumulating snow under the straps that go under the boot. I’ll have to think of a solution for that.
1

2

The end.